


Moving Off Netlify Forms Without Losing Submissions
A form on Netlify works because Netlify's build finds it and Netlify's servers receive the POST. Move the site to another host and neither is true. The page still renders and the form still looks fine, but nothing receives the submission. Your old submissions stay in the Netlify dashboard, tied to a site you may be about to stop using.
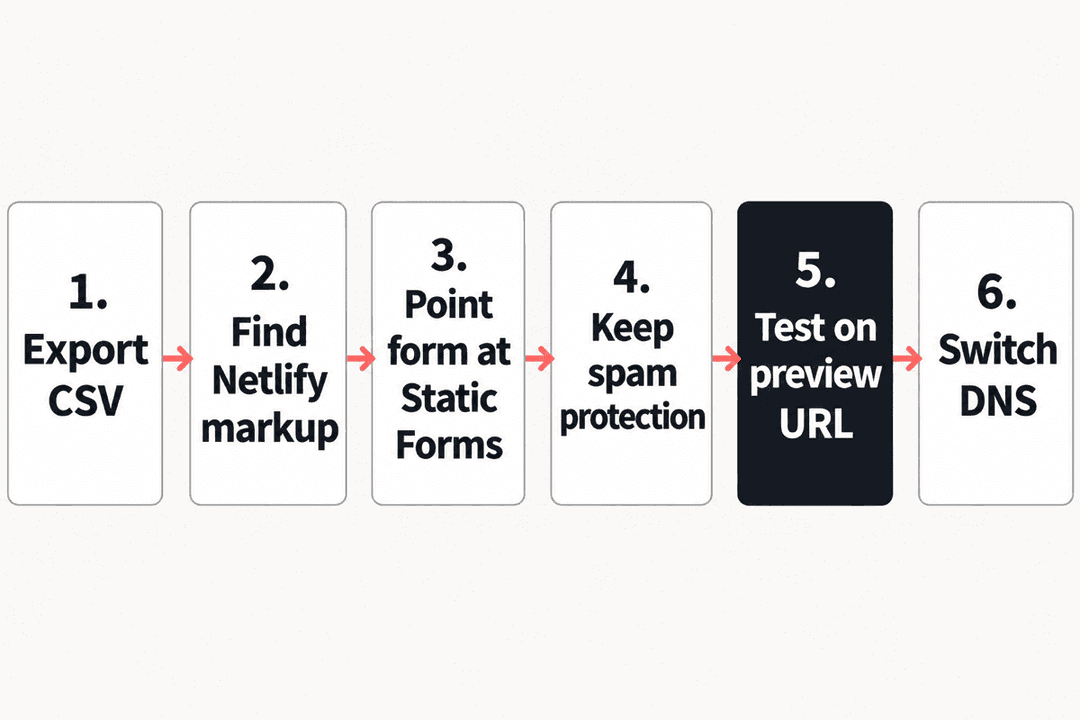
This guide covers the order that keeps both safe: export what you have, find every place the form depends on Netlify, point it at Static Forms, keep your spam protection, and test before you change DNS. For a feature comparison, read Netlify Forms vs Static Forms. For the Netlify-side setup basics, see the Netlify docs page.
We make Static Forms, so treat the Static Forms parts as ours. The Netlify facts below come from Netlify's own documentation, checked on 2026-11-22.
Step 1: Export your Netlify submissions first
Do this before you touch the form or the DNS. Netlify's docs say a deleted form takes its submissions with it ("previous submissions will no longer be available"), so export first.
- In Netlify, open your site and go to the Forms tab.
- Select the form.
- Select Download as CSV near the top of the form's page.
Two limits from Netlify's submissions documentation:
- Only verified submissions are exported. Netlify exports verified submissions only, so review the spam list in the dashboard yourself before you leave.
- Uploaded files are links, not files. The CSV holds links to uploads. Netlify's docs say uploads stay available by their direct URL for 24 hours after a form is deleted, so download the files themselves while the site is live.
If a site has many forms, repeat the export for each one. Netlify's API guide lists the forms endpoints, including one for a site's submissions and a state=spam query for spam. Start there if you want to script the export.
Keep the CSVs somewhere you control. Static Forms does not import past submissions from another service, so treat the export as your archive of the old history. New submissions start in your Static Forms inbox from the day you switch.
Step 2: Find what still depends on Netlify
Search your repository for the pieces that only work on Netlify. These are the ones that matter:
| Search for | What it is |
|---|---|
data-netlify or a bare netlify attribute on <form> |
Marks the form for Netlify's build to detect |
form-name |
The hidden input Netlify's build injects, or one you added by hand for a form rendered by JavaScript |
netlify-honeypot and a field called bot-field |
Netlify's honeypot spam trap |
data-netlify-recaptcha |
Netlify's reCAPTCHA widget |
/.netlify/functions/ |
A Netlify Function you wrote to handle the form or post-process it |
netlify.toml and _redirects |
Redirects or build settings that route form traffic |
SITE_RECAPTCHA_KEY, SITE_RECAPTCHA_SECRET |
Environment variables for a custom reCAPTCHA on Netlify |
These attribute names come from Netlify's form setup documentation. A few things to look for in practice:
- JavaScript forms. A React, Vue or Gatsby form often posts with
fetchto/and includesform-namein the body. That request has to change, not just the markup. - A hidden copy of the form. Sites that render forms in JavaScript often keep a static HTML copy, only so Netlify can detect the form at build time. It can go once the form no longer needs detection.
- Notifications set in the Netlify UI. Email, Slack and webhook notifications live in Netlify's site settings, not in your code. Write down each one so you can recreate it in Static Forms; email notifications work on every plan, while webhooks and Slack are (Starter and up).
Step 3: Point the form at Static Forms
Create a free account on the registration page, then copy your API key from the dashboard. The Quick Start walks through it.
Replace the Netlify attributes with the Static Forms endpoint and API key. A typical Netlify form:
<form name="contact" method="POST" data-netlify="true" netlify-honeypot="bot-field" action="/thanks">
  <input type="hidden" name="form-name" value="contact" />
  <input type="text" name="bot-field" style="display:none" />
  <input type="text" name="name" required />
  <input type="email" name="email" required />
  <textarea name="message" required></textarea>
  <button type="submit">Send</button>
</form>
becomes:
<form action="https://api.staticforms.dev/submit" method="POST">
  <input type="hidden" name="apiKey" value="YOUR_API_KEY" />
  <input type="hidden" name="redirectTo" value="https://yoursite.com/thanks" />
  <input type="text" name="honeypot" style="display:none" tabindex="-1" autocomplete="off" />
  <input type="text" name="name" required />
  <input type="email" name="email" required />
  <textarea name="message" required></textarea>
  <button type="submit">Send</button>
</form>
What changed:
actionis nowhttps://api.staticforms.dev/submit.data-netlify,netlify-honeypotand theform-nameinput are gone.- The API key is a hidden
apiKeyfield. Your key is meant to sit in public HTML; see why a public form key is not a leaked secret. - On Netlify,
actionset a custom thank-you page. On Static Forms, that is theredirectTofield, and it takes priority over the redirect URL saved on the form in your dashboard. Use a full URL.
If your form posted with fetch, send JSON to the same endpoint and drop form-name:
await fetch('https://api.staticforms.dev/submit', {
  method: 'POST',
  headers: { 'Content-Type': 'application/json' },
  body: JSON.stringify({
    apiKey: 'YOUR_API_KEY',
    name: 'Ada',
    email: 'ada@example.com',
    message: 'Hello',
  }),
});
The API reference lists every field and the responses. If you wrote a Netlify Function to relay the form, you can delete it once the form posts directly. Anything the function did afterward, such as posting to another service, becomes an integration on the Static Forms side. The integrations docs list what each plan includes.
Step 4: Keep your spam protection
Spam protection is easy to miss, because Netlify applied some of it for you. Netlify runs every submission through Akismet, and its honeypot and reCAPTCHA rejections never reach your spam list. Rebuild the equivalent in Static Forms:
| On Netlify | On Static Forms |
|---|---|
netlify-honeypot="bot-field" with a hidden bot-field input |
A hidden input whose name contains honeypot, such as honeypot. Static Forms treats any field with "honeypot" in its name as a trap and silently rejects a submission when it is filled. See honeypot fields. |
data-netlify-recaptcha="true" |
reCAPTCHA v2 with your own site key, sent as g-recaptcha-response. See the reCAPTCHA guide. |
| Akismet filtering | Static Forms runs its own spam filter. |
Renaming bot-field matters. A field called bot-field does not contain "honeypot", so leaving it in place protects nothing on Static Forms.
If you want Turnstile, hCaptcha, Altcha or reCAPTCHA v3, those are available on (Starter and up). The guides are Turnstile, hCaptcha and Altcha.
Step 5: Test before the DNS cutover
You do not need to move DNS to test the form. Deploy the updated site to the new host's preview URL, or open the page locally, and check:
- Submit the form with real-looking data and confirm the email arrives and the entry shows in your Static Forms dashboard.
- Check that every field you collect appears in the submission. A field renamed during the move is easy to miss.
- Confirm the redirect lands on your thank-you page.
- Fill the honeypot field by hand, using your browser's developer tools, and confirm no submission arrives.
- If the form has file uploads, send a real file. Uploads need (Starter and up), and a file sent on a plan without them is rejected rather than dropped quietly.
- If you turned on domain restriction, add the new host's preview domain to the allowed list before testing, or the request is rejected. Domain restriction also rejects requests with no
Origin, such as a page opened from afile://path, so test from a local server or the preview domain. Remove it after the cutover if you do not want it kept. - Submit once more from the production domain right after DNS moves.
Leave the old Netlify site up until the last check passes. Both sites can run at once, so the form works on whichever one visitors reach while DNS propagates.
Migration checklist
- Export every form's submissions to CSV from the Netlify Forms tab
- Review the Netlify spam list, since the CSV leaves it out
- Download uploaded files, since the CSV only links to them
- Search the repo for
data-netlify,form-name,netlify-honeypot,data-netlify-recaptchaand/.netlify/functions/ - Write down notifications configured in the Netlify UI
- Create a Static Forms account and copy the API key
- Change the form
action, addapiKeyandredirectTo, and remove the Netlify attributes - Rename
bot-fieldto a name containinghoneypot - Add reCAPTCHA or another CAPTCHA if the Netlify form used one
- Recreate your notifications in Static Forms
- Test on a preview URL, including spam and file upload cases
- Switch DNS, then submit once from the live domain
- Keep the Netlify CSVs and the old site until you have confirmed the first live submissions
Troubleshooting
The form returns a 404 or 405 on the new host. The form still posts to your own site. Check that action is the full https://api.staticforms.dev/submit URL, and that no fetch call still posts to /.
Submissions arrive but fields are missing. Compare the name attributes before and after the move. Static Forms stores what the form sends, so a renamed input shows up under its new name.
The submission is rejected with a domain error. Domain restriction is on and the origin is not on the allowed list. The error message names the domain it saw.
Spam started after the move. You probably kept bot-field. Rename it to contain honeypot, and consider a CAPTCHA.
Next steps
You can run the free plan alongside your Netlify site while you test. When you are ready, create an account, follow the Quick Start, and see pricing for plan limits. For the full Netlify-side comparison, including where Netlify Forms is the better fit, read Netlify Forms vs Static Forms.
Related Articles
Netlify Forms vs Static Forms: Complete Comparison (2026)
Compare Netlify Forms and Static Forms features, pricing, AI Reply, and ease of use. Find the best form backend solution for your static website in 2026.
Formspree vs Web3Forms vs Static Forms (2026): Compared
Formspree vs Web3Forms vs Static Forms on free tiers, paid plans, spam tools, integrations and retention, checked 3 November 2026, and when each one wins.
HTML radio button required: validate one choice per group
Fix required radio groups with shared names, explicit values, and accessible labels. Test empty selections, keyboard input, and FormData in a local checker.