

Make a Lovable Contact Form Send Real Email
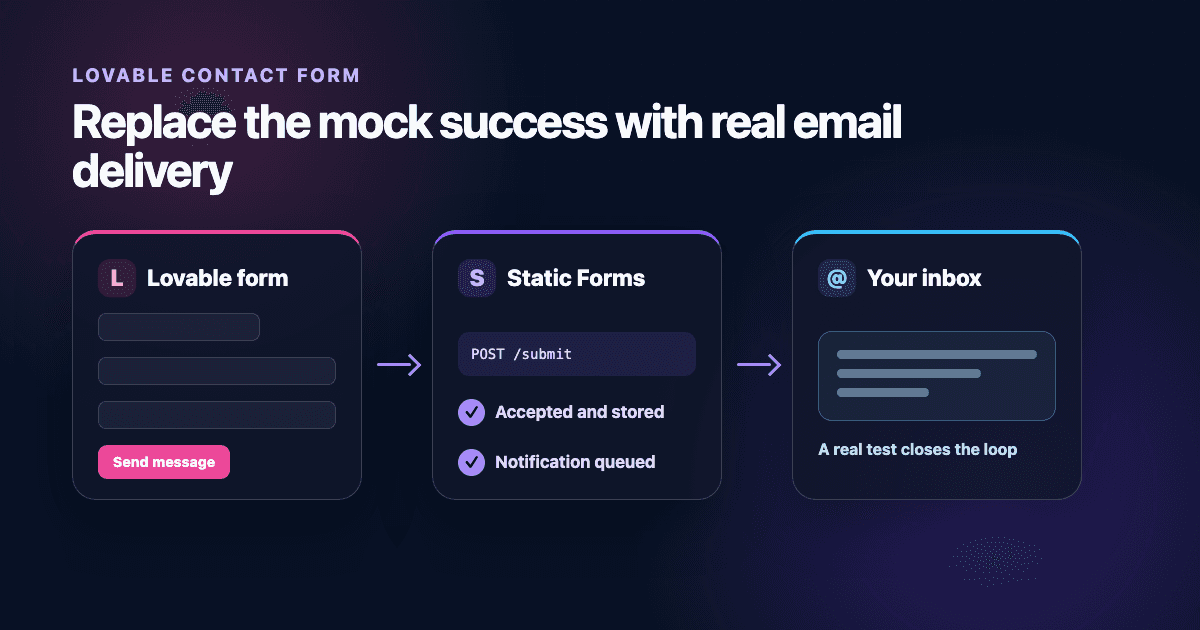
A Lovable contact form can look finished while its submit button only changes local state. To make it send real email, connect the generated React form to a server-side email workflow or a hosted form endpoint, then test the published site and the receiving inbox.
This guide uses Static Forms because it gives the Lovable app one HTTPS endpoint for submissions, storage, and email notifications. The form key appears in browser code by design; email-provider secrets do not.
Choose the right email path first
Lovable now has several ways to send email. Pick based on what should happen after submission:
| What you need | Suitable path |
|---|---|
| Store contact submissions and notify an inbox | Hosted form endpoint such as Static Forms |
| Send transactional app email from a paid Lovable Cloud workspace | Lovable Cloud custom email |
| Use an existing email provider | Lovable's Resend connector |
| Run custom server logic or write to your own database | Supabase Edge Function or a TanStack Start server function |
Lovable's managed email feature is for transactional messages, not newsletters. It also does not automatically turn a generated contact form into a submission inbox. If all you want is a reliable contact form, a form endpoint is usually the shorter route.
New Lovable projects use TanStack Start, while older projects may still use React and Vite. The component below works as client-side React in either setup. Ask Lovable, What stack is this project using?, before changing project-wide configuration.
Create the form destination
Create a Static Forms account, add a form, and copy its form API key. Check Form → Delivery to confirm the primary recipient. Also check Account → Notifications if the owner should receive every submission. The delivery guide explains recipient settings, while the notification guide covers account-level email preferences.
A form API key is a public routing identifier. Visitors can see it in the browser regardless of whether you paste it into the component or expose it through a client environment variable. Do not put a Resend key, SMTP password, private account credential, or any other server secret beside it.
Replace the mock submit handler
Generated forms often contain a handler that waits briefly and shows a success toast. That tests the interface, not delivery. Replace that handler with a real request to https://api.staticforms.dev/submit.
The following component has labels, native validation, an accessible status message, a honeypot, duplicate-click protection, and defensive error handling:
import { FormEvent, useState } from "react";

const STATIC_FORMS_KEY = "YOUR_PUBLIC_FORM_KEY";

export function ContactForm() {
  const [status, setStatus] = useState<"idle" | "sending" | "sent" | "error">(
    "idle",
  );
  const [error, setError] = useState("");

  async function handleSubmit(event: FormEvent<HTMLFormElement>) {
    event.preventDefault();

    if (status === "sending") return;

    const form = event.currentTarget;
    const formData = new FormData(form);

    setStatus("sending");
    setError("");

    try {
      const response = await fetch("https://api.staticforms.dev/submit", {
        method: "POST",
        headers: { "Content-Type": "application/json" },
        body: JSON.stringify({
          apiKey: STATIC_FORMS_KEY,
          name: formData.get("name"),
          email: formData.get("email"),
          message: formData.get("message"),
          honeypot: formData.get("honeypot"),
        }),
      });

      const result = await response.json();

      if (!response.ok || !result.success) {
        throw new Error(
          result.error ??
            result.errors?.[0]?.message ??
            result.message ??
            "Unable to send your message.",
        );
      }

      form.reset();
      setStatus("sent");
    } catch (caught) {
      setError(
        caught instanceof Error
          ? caught.message
          : "Unable to send your message.",
      );
      setStatus("error");
    }
  }

  return (
    <form onSubmit={handleSubmit} aria-busy={status === "sending"}>
      <div>
        <label htmlFor="contact-name">Name</label>
        <input id="contact-name" name="name" autoComplete="name" required />
      </div>

      <div>
        <label htmlFor="contact-email">Email</label>
        <input
          id="contact-email"
          name="email"
          type="email"
          autoComplete="email"
          required
        />
      </div>

      <div>
        <label htmlFor="contact-message">Message</label>
        <textarea id="contact-message" name="message" rows={6} required />
      </div>

      <div
        aria-hidden="true"
        style={{ position: "absolute", left: "-10000px" }}
      >
        <label htmlFor="contact-company">Leave this field empty</label>
        <input
          id="contact-company"
          name="honeypot"
          tabIndex={-1}
          autoComplete="off"
        />
      </div>

      <button type="submit" disabled={status === "sending"}>
        {status === "sending" ? "Sending..." : "Send message"}
      </button>

      <div role="status" aria-live="polite">
        {status === "sent" &&
          "Message received. We'll reply as soon as we can."}
        {status === "error" && error}
      </div>
    </form>
  );
}
Replace YOUR_PUBLIC_FORM_KEY with the key for the intended form. Keep the field names stable: they become the labels in the stored submission and email. The email field is also used as the reply-to address after validation.
The API can return errors in more than one shape. Checking error, the first item in errors, and message prevents the form from hiding useful validation failures. A successful JSON response contains success: true; it confirms that Static Forms accepted the request, not that a recipient has opened or even received the email.
Understand what the component is doing
The browser sends JSON directly to the form endpoint. Static Forms looks up the destination using apiKey, validates the fields, applies the configured spam and rate controls, and records an accepted submission. Email delivery happens after that acceptance step.
This separation explains two details that otherwise look odd. First, the public form key cannot grant dashboard access or reveal old submissions; it only identifies where new data should go. Second, the success message should follow the API response rather than the email provider. Making a visitor wait for mailbox delivery would keep the form hanging on a slower, separate system.
The component uses FormData only to read the current controls, then converts the values to JSON. That keeps the request easy to inspect in DevTools. If you later add file inputs, switch to a multipart FormData request and do not set Content-Type yourself; the browser must supply its boundary. Check the current API reference and your plan's upload limits before adding attachments.
A server function is the better choice when submission handling needs private credentials, privileged database writes, or custom authorization. In that design, the browser calls your function and the function calls the email provider or other protected service. Keep the same loading, error, and accessibility behavior in the component, but move the sensitive operation out of browser code.
Give Lovable a precise prompt
If you want Lovable to make the edit, vague instructions tend to produce another mock. Use a prompt that names the endpoint, the security boundary, and the expected states:
Connect the existing contact form to Static Forms.

POST JSON to https://api.staticforms.dev/submit with these fields:
apiKey, name, email, message, and honeypot.

Use YOUR_PUBLIC_FORM_KEY as the form's public key. Do not create or expose
an email-provider secret. Preserve the current design and visible labels.
Add sending, success, and error states; disable the button while sending;
announce the result with role="status" and aria-live="polite"; and only
show success after the API returns a 2xx response with success: true.
Handle API errors from error, errors[0].message, or message.
Review the generated diff. In particular, reject any change that puts a Resend or SMTP credential in VITE_*, NEXT_PUBLIC_*, component code, or the Git repository. Lovable's own secrets documentation is explicit that VITE_* values are embedded in the browser bundle.
Add spam and origin controls
A hidden honeypot catches simple bots without adding a visible challenge. Static Forms treats a filled honeypot as spam and returns an apparent success response, which avoids teaching automated senders how the check works.
For more protection, configure CAPTCHA or another option from the form security guide. Domain restriction is available on eligible plans and checks the browser's Origin, falling back to Referer. Add the final Lovable domain without a protocol or path. If you use a custom domain, add that too. The domain restriction guide covers localhost testing and allowed subdomains.
Do not treat CORS as an allowlist. The public submission endpoint accepts browser requests from many origins so customer sites can use it. Domain restriction, rate controls, spam filtering, and CAPTCHA are the controls that decide whether a submission should proceed.
Contact forms receive untrusted text. Avoid collecting passwords, payment-card details, health records, or other sensitive data unless your design, contracts, retention rules, and access controls are built for it. Never interpolate the message into raw HTML without escaping it.
Publish and test the real site
Lovable's browser testing runs against the current preview. Publishing creates a deployed snapshot, so later edits require Publish changes before visitors receive them.
Use a unique test message, such as Lovable production test 2026-08-22, and check the complete path:
- Submit once from the published Lovable URL.
- Confirm the button cannot send a second request while the first is pending.
- Confirm the success message appears only after the API accepts the request.
- Find the unique message in the Static Forms inbox.
- Confirm the notification arrives at the configured mailbox.
- Submit with a malformed email and with a required field missing.
- Inspect the browser's Network panel if the interface reports an error.
The inbox and email are separate checks. If the inbox has the submission but the email is missing, inspect the recipient configuration, account notification setting, spam folder, and delivery status. Do not keep changing the React component after the API has already accepted the data.
Fix the failures that show up most often
| Symptom | Likely cause | Fix |
|---|---|---|
| The form says success, but no request appears in Network | The old mock handler is still running | Search for timers, fake promises, and unconditional success toasts |
API key is required |
The body omitted apiKey or used the wrong property name |
Send apiKey in the JSON body |
Invalid API key |
The copied key belongs to another or deleted form | Copy the current form key from the dashboard |
| The browser receives 403 | A domain or CAPTCHA rule rejected the request | Check the response body, published hostname, and configured security settings |
| The inbox has data, but email is absent | Acceptance and email delivery are different stages | Check Delivery, Account Notifications, and the recipient's spam folder |
| Preview works, but production does not | The latest Lovable changes were not published or the live domain is not allowed | Publish again and test from the final URL |
| A visitor can submit twice | The button stays active while the request is pending | Keep the sending guard and disabled button |
Use the React integration reference for shorter examples and the API reference for supported request formats. Once the published test reaches both the inbox and the recipient mailbox, remove the test submission and keep one failed-path test in your release checklist.
Related Articles
Add Email to a Replit Website Contact Form
Connect a Replit website contact form to email with plain HTML and React examples, safe key handling, publishing checks, spam controls, and fixes.
React Contact Form with Email (No Backend Required)
Build a fully functional React contact form that sends emails without a backend server. Complete tutorial with hooks, validation, and spam protection.
Make a Claude-Generated Website Contact Form Send Email
Fix a Claude-generated website contact form that fakes success. Trace the handler, patch HTML or React, protect secrets, and test the published Artifact.







































