

Add Email to a Replit Website Contact Form
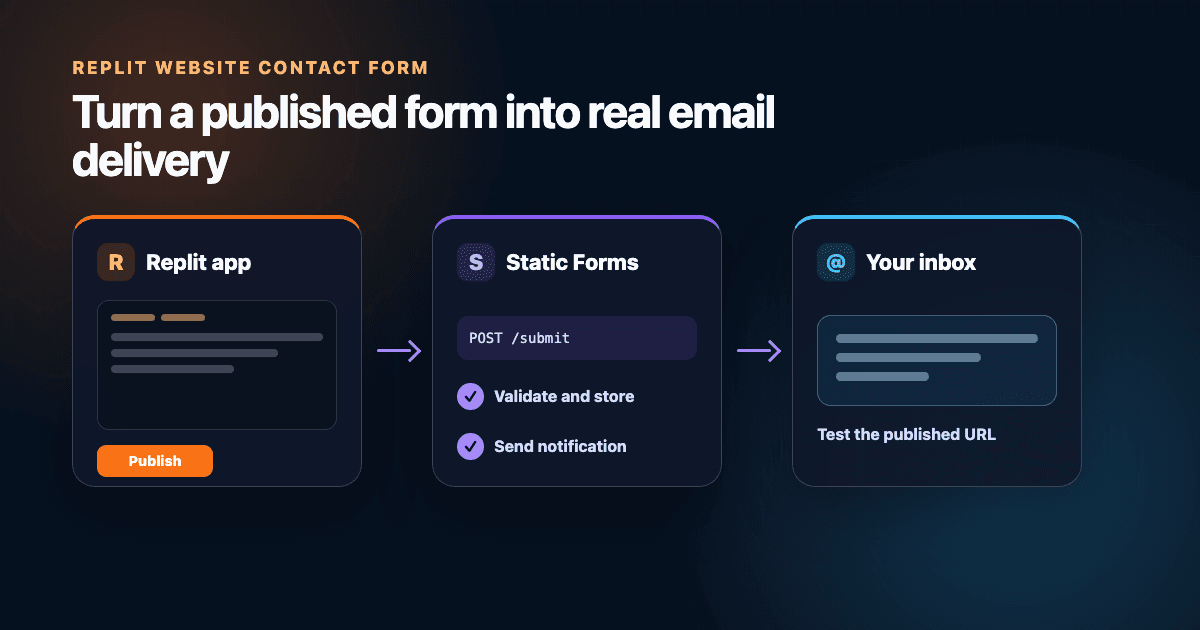
A Replit contact form does not need its own mail server. The browser can post the form to a hosted endpoint, which stores the submission and sends the notification without putting an email-provider password in your app.
This guide covers both kinds of Replit project you are likely to meet: a plain HTML site and a React app. By the end, a submission from the published Replit URL will appear in the Static Forms inbox and travel to the recipient you configured.
Check what Replit built
Open the Files panel before changing the form.
- If you see
index.html,style.css, and perhapsscript.js, use the plain HTML version below. - If you see
src/App.jsx,src/App.tsx, or another component tree, use the React version. - If Agent created a full-stack app, you can still submit directly from the browser. You only need the app's server when the form must use private credentials or run privileged logic.
This distinction also affects publishing. Replit's current deployment type guide says Static Deployments serve HTML, CSS, and JavaScript without a backend. Apps created with Replit Agent use a backend deployment such as Autoscale or Reserved VM instead. The form code in this article works in either case because the submission endpoint is hosted separately.
Create the form destination
Create a Static Forms account, add a form, and copy its form API key. Confirm the recipient under Form → Delivery before touching the Replit code. The delivery guide explains the recipient settings.
The form key is a public routing identifier. Anyone can inspect it in browser code, so moving it into a client-side environment variable does not make it secret. It cannot open your dashboard or read past submissions.
Private credentials are different. Replit's Secrets tool exposes encrypted values to server code as environment variables, but Replit notes that Secrets are unavailable to Static Deployments. Never place an SMTP password, email-provider token, database credential, or account token in HTML, React code, or a VITE_* variable.
Connect a plain HTML form
A standard browser submission needs no JavaScript. Replace the existing mock form with this version, then restore your own classes so it matches the page:
<form action="https://api.staticforms.dev/submit" method="post">
  <input type="hidden" name="apiKey" value="YOUR_PUBLIC_FORM_KEY" />
  <input
    type="hidden"
    name="redirectTo"
    value="https://YOUR-PUBLISHED-DOMAIN/thanks"
  />

  <label for="contact-name">Name</label>
  <input id="contact-name" name="name" autocomplete="name" required />

  <label for="contact-email">Email</label>
  <input
    id="contact-email"
    name="email"
    type="email"
    autocomplete="email"
    required
  />

  <label for="contact-message">Message</label>
  <textarea id="contact-message" name="message" rows="6" required></textarea>

  <div aria-hidden="true" class="contact-honeypot">
    <label for="contact-company">Leave this field empty</label>
    <input
      id="contact-company"
      name="honeypot"
      tabindex="-1"
      autocomplete="off"
    />
  </div>

  <button type="submit">Send message</button>
</form>.contact-honeypot {
position: absolute;
left: -10000px;
width: 1px;
height: 1px;
overflow: hidden;
}Replace YOUR_PUBLIC_FORM_KEY. Change YOUR-PUBLISHED-DOMAIN to the final Replit hostname or custom domain, and create the /thanks page before testing. The API accepts standard URL-encoded form posts and uses redirectTo after a successful submission.
Keep visible labels even if the design already uses placeholders. A placeholder disappears when someone types; a label keeps the field understandable and gives assistive technology a stable name.
Connect a React form
React can keep the visitor on the same page and show the result beside the button. This component includes native validation, a hidden honeypot, duplicate-click protection, and an announced status message:
import { FormEvent, useState } from "react";

const STATIC_FORMS_KEY = "YOUR_PUBLIC_FORM_KEY";

type SubmitStatus = "idle" | "sending" | "sent" | "error";

interface SubmitResult {
  success?: boolean;
  error?: string;
  message?: string;
  errors?: Array<{ message?: string }>;
}

export function ContactForm() {
  const [status, setStatus] = useState<SubmitStatus>("idle");
  const [error, setError] = useState("");

  async function handleSubmit(event: FormEvent<HTMLFormElement>) {
    event.preventDefault();
    if (status === "sending") return;

    const form = event.currentTarget;
    const data = new FormData(form);

    setStatus("sending");
    setError("");

    try {
      const response = await fetch("https://api.staticforms.dev/submit", {
        method: "POST",
        headers: { "Content-Type": "application/json" },
        body: JSON.stringify({
          apiKey: STATIC_FORMS_KEY,
          name: data.get("name"),
          email: data.get("email"),
          message: data.get("message"),
          honeypot: data.get("honeypot"),
        }),
      });

      const result = (await response.json()) as SubmitResult;

      if (!response.ok || !result.success) {
        throw new Error(
          result.error ??
            result.errors?.[0]?.message ??
            result.message ??
            "Your message could not be sent.",
        );
      }

      form.reset();
      setStatus("sent");
    } catch (caught) {
      setError(
        caught instanceof Error
          ? caught.message
          : "Your message could not be sent.",
      );
      setStatus("error");
    }
  }

  return (
    <form onSubmit={handleSubmit} aria-busy={status === "sending"}>
      <label htmlFor="contact-name">Name</label>
      <input id="contact-name" name="name" autoComplete="name" required />

      <label htmlFor="contact-email">Email</label>
      <input
        id="contact-email"
        name="email"
        type="email"
        autoComplete="email"
        required
      />

      <label htmlFor="contact-message">Message</label>
      <textarea id="contact-message" name="message" rows={6} required />

      <div
        aria-hidden="true"
        style={{ position: "absolute", left: "-10000px" }}
      >
        <label htmlFor="contact-company">Leave this field empty</label>
        <input
          id="contact-company"
          name="honeypot"
          tabIndex={-1}
          autoComplete="off"
        />
      </div>

      <button type="submit" disabled={status === "sending"}>
        {status === "sending" ? "Sending..." : "Send message"}
      </button>

      <p role="status" aria-live="polite">
        {status === "sent" && "Thanks. Your message has been received."}
        {status === "error" && error}
      </p>
    </form>
  );
}
Replace YOUR_PUBLIC_FORM_KEY, import the component into the page, and remove any old timer or unconditional success toast. A success message should appear only after the endpoint returns a successful response with success: true.
The browser sends JSON to https://api.staticforms.dev/submit. Static Forms uses apiKey to find the destination, validates the fields, applies the form's spam controls, and records an accepted submission. Email delivery follows that acceptance step. The API reference documents the request formats, response codes, and special field names.
Add spam and domain controls
The honeypot catches basic automated submissions without asking visitors to solve a challenge. Do not hide it with the HTML disabled attribute because disabled controls are not submitted.
For a public site that attracts heavier spam, choose another option from the form security guide. If domain restriction is enabled for the account, add the published Replit hostname without https:// or a path. Add the custom domain too if you connect one later. Static Forms checks the request's Origin or Referer, and its domain restriction guide explains subdomains and localhost testing.
CORS is not the same control. The submission API accepts cross-origin browser requests so forms can run on customer sites. Domain restriction, rate controls, the spam filter, and CAPTCHA decide which requests should proceed.
Do not ask for passwords, card numbers, medical details, or other sensitive information in a general contact form. Every visitor-controlled field should also be escaped before it is inserted into any custom HTML email or rendered page.
Publish the Replit app and test delivery
Replit Publishing creates a live snapshot separate from the files open in the Project Editor. Follow Replit's current publishing steps, then test the public URL rather than relying on Preview.
Use a unique message such as Replit production test 2026-08-23 and check each boundary:
- Submit once from the published Replit URL.
- Confirm the button cannot create a second request while the first is pending.
- Find the unique message in the Static Forms inbox.
- Check the configured recipient mailbox and spam folder.
- Try a malformed email and a missing required field.
- If domain restriction is on, test both the Replit hostname and the custom domain.
- Publish again after later edits; changing files in the editor does not update an existing live snapshot by itself.
An accepted API response proves that the form service received the submission. It does not prove that a mailbox accepted the notification. Treat the Static Forms inbox and the recipient inbox as two separate checks.
Fix common Replit form failures
| Symptom | Likely cause | Check |
|---|---|---|
| The button claims success but no request appears | The generated mock handler is still active | Search for setTimeout, fake promises, and unconditional success toasts |
API key is required |
The body omitted apiKey or used a different property name |
Inspect the request payload in DevTools |
Invalid API key |
The form key is stale or belongs to another form | Copy the current key from the intended form |
| Preview works but the published site fails | The live snapshot is old or its hostname is not allowed | Republish, then check domain restriction |
| The submission appears in Static Forms but no email arrives | Form acceptance and email delivery are separate | Check the recipient, delivery status, and spam folder |
| The browser shows a network error | The endpoint, network, or response handling failed | Inspect the Network panel's status and response body |
| A private token is visible in the JavaScript bundle | A server credential was placed in client code | Revoke it, remove it from Git history, and move the operation to server code using Replit Secrets |
The React integration guide has shorter variants if you do not need the full component. Keep one successful production submission and one failed-path check in your release routine. That catches the two Replit-specific mistakes that previews tend to hide: an unpublished edit and a missing live hostname in the domain allowlist.
Related Articles
Make a Claude-Generated Website Contact Form Send Email
Fix a Claude-generated website contact form that fakes success. Trace the handler, patch HTML or React, protect secrets, and test the published Artifact.
Make a Lovable Contact Form Send Real Email
Connect a Lovable contact form to real email with a copy-paste React example, safe key handling, spam controls, deployment tests, and troubleshooting.
HTML Form That Sends Email Without Server (2026)
Create an HTML contact form that sends emails directly to your inbox without PHP, Node.js, or any backend code. Complete beginner-friendly guide.







































