

Send Webflow Form Submissions to Email Without Restyling
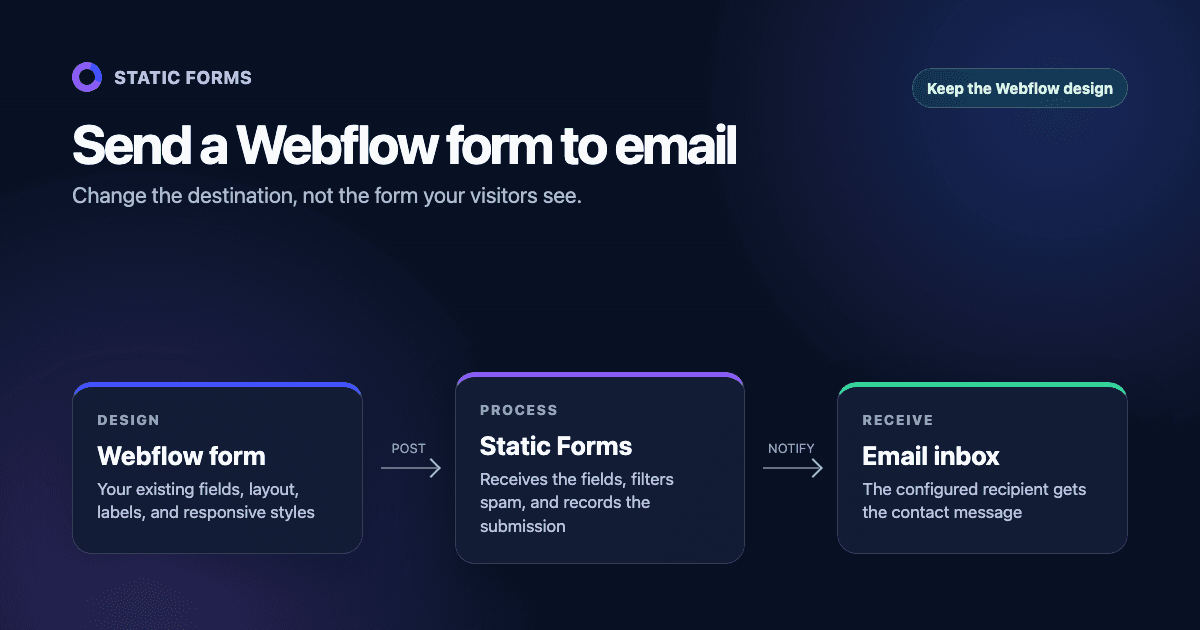
Webflow already gives you the layout, validation, and responsive styling. To send that same form through Static Forms, point the Form element at the submission endpoint and add two hidden fields. The visible design does not need to change.
There is one trade-off to understand first: a Webflow Custom action bypasses Webflow's form processing. Webflow will not store those submissions or send its own notification emails. Static Forms becomes the processor and sends the notification instead. Webflow documents this behavior in its current forms guide.
This guide covers the basic redirect flow first, then an optional script that keeps Webflow's inline success and error panels.
What you need
You need a Webflow form and a form API key from the Static Forms dashboard. The key appears in the published page because the visitor's browser needs it to identify the form. Treat it as a public form identifier, not as a server secret.
Create a thank-you page in Webflow and publish it. You will use its absolute HTTPS URL, such as https://example.com/thank-you, after a successful submission.
Give every Webflow field a useful name
Static Forms receives controls by their HTML name, not their visual label or element ID. Select each input in Webflow and check the Name field under Element settings.
Use stable names such as:
| Visible field | Name sent with the form |
|---|---|
| Name | name |
| Email address | email |
| Company | company |
| Message | message |
Keep the email field's name lowercase as email. Static Forms can use that value as the reply-to address when you reply to a notification. The browser's required, type="email", and minlength checks improve the experience, but they do not replace server-side processing.
Point the Webflow form at Static Forms
Select the Form element itself, not the Form Block wrapper or an individual input. In Form settings:
- Remove the Webflow and Email notification destinations.
- Add Custom action.
- Set the action URL to
https://api.staticforms.dev/submit. - Set the method to
POST.
Webflow's custom action writes ordinary action and method attributes into the published HTML. The browser can therefore submit the form without a Webflow app or a server function.
If you must keep Webflow's submission storage or Webflow-generated notification emails, stop here. Webflow says Custom action cannot run alongside those destinations. Use a Webflow App or webhook workflow instead, and check which system is responsible for retries and email delivery before going live.
Add the API key and thank-you URL
Drag a Code Embed element inside the Form element. Paste this markup:
<input type="hidden" name="apiKey" value="YOUR_API_KEY">
<input
  type="hidden"
  name="redirectTo"
  value="https://example.com/thank-you"
>

<div class="contact-honeypot" aria-hidden="true">
  <label for="contact-website">Leave this field empty</label>
  <input
    id="contact-website"
    name="honeypot"
    type="text"
    tabindex="-1"
    autocomplete="off"
  >
</div>

<style>
  .contact-honeypot {
    position: absolute;
    left: -10000px;
    width: 1px;
    height: 1px;
    overflow: hidden;
  }
</style>
Replace YOUR_API_KEY and the thank-you URL. Do not put a webhook token, automation credential, or another private secret in the Embed.
The honeypot is deliberately a text field moved off screen. Basic bots often fill it, while keyboard and screen-reader users do not encounter it. Static Forms treats a filled honeypot as spam. It helps with simple automated submissions, but it will not stop a determined attacker. The honeypot documentation explains how to test it and when to add a CAPTCHA.
Publish the site after changing form settings or custom code. Webflow's Designer preview does not reproduce every detail of a published custom-code form.
Test the redirect version first
Open the published URL in a private browser window and submit a unique message. Use a subject or message such as Webflow production test 2026-08-20 so you can recognize it later.
A successful native form POST should send the browser to your thank-you page. Then confirm the submission appears in the Static Forms inbox and check the configured recipient mailbox. A recorded submission and a delivered email are separate checks; spam filtering, a rejected recipient, or an old mailbox rule can affect the second one.
Also test the failures readers tend to skip:
- Remove a required value. The browser should keep the form on the page and identify the field.
- Enter an invalid email address. An input with
type="email"should fail native validation. - Fill the honeypot through DevTools. The message should not reach the recipient.
- Use the keyboard for the whole form. The focus indicator and submit button must remain visible.
- Submit from the final custom domain, not only the Webflow staging hostname.
Keep Webflow's inline success and error panels
The redirect version is the least fragile setup. It does not, however, display Webflow's built-in .w-form-done and .w-form-fail panels. A Custom action sends the browser away from the page.
If an inline result matters, add a custom attribute named data-static-forms to the Form Block wrapper, then place this script before </body> in the page settings. Keep the hidden redirectTo field from the previous step so the form still has a native fallback when JavaScript fails to load.
<script>
document.addEventListener("DOMContentLoaded", () => {
  const wrapper = document.querySelector("[data-static-forms]");
  const form = wrapper?.querySelector("form");
  const success = wrapper?.querySelector(".w-form-done");
  const failure = wrapper?.querySelector(".w-form-fail");
  const button = form?.querySelector('[type="submit"]');

  if (!form || !success || !failure || !button) return;

  form.addEventListener("submit", async (event) => {
    event.preventDefault();
    if (!form.reportValidity() || button.disabled) return;

    button.disabled = true;
    success.style.display = "none";
    failure.style.display = "none";

    try {
      const response = await fetch(form.action, {
        method: "POST",
        body: new FormData(form),
        headers: { Accept: "application/json" }
      });
      const result = await response.json();

      if (!response.ok || !result.success) {
        throw new Error(result.error || "The form could not be submitted.");
      }

      form.reset();
      form.style.display = "none";
      success.style.display = "block";
      success.setAttribute("tabindex", "-1");
      success.focus();
    } catch (error) {
      console.error("Contact form submission failed", error);
      failure.style.display = "block";
      failure.setAttribute("tabindex", "-1");
      failure.focus();
    } finally {
      button.disabled = false;
    }
  });
});
</script>
This script uses the existing Webflow panels, so you can edit their text and style in the Designer. It disables the submit button while the request is running and checks the HTTP response before showing success. A green message should never appear merely because fetch() resolved; HTTP 400 and 403 responses also resolve normally.
Webflow warns that custom scripts can conflict with its own event handling. Test this version after every structural form change. If another script replaces the form or intercepts the same submit event, use the redirect version instead.
Domain restriction and spam controls
After the production hostname works, consider domain restriction. It limits browser submissions to allowed hosts and their subdomains. Add the custom domain plus any webflow.io staging hostname that your team still uses for real tests. Missing or disallowed origins produce HTTP 403.
Domain restriction is a paid-plan feature, so check the current pricing page rather than copying an old plan matrix. The honeypot is available without dashboard setup. Static Forms also supports several CAPTCHA options; provider availability varies by plan, and CAPTCHA needs more setup than dropping a widget into the page. Start with the form security overview before enabling one.
If your site has a Content Security Policy, the native and JavaScript flows use different directives:
Content-Security-Policy: form-action 'self' https://api.staticforms.dev; connect-src 'self' https://api.staticforms.devMerge those sources into the site's existing policy. Do not replace a production CSP with this short fragment; your site may need other script, image, font, and connection sources.
Troubleshooting Webflow form email delivery
| Symptom | Likely cause | What to check |
|---|---|---|
| The browser shows a plain Static Forms response | redirectTo is missing or invalid |
Add an absolute https:// thank-you URL in the hidden field |
| The page returns an API-key error | The Embed still has YOUR_API_KEY, or the key is inactive |
Inspect the published HTML and copy the current key from the dashboard |
| A field is absent from the message | The control has no name, or its name changed |
Check the published input and use a stable lowercase name |
| The form works on staging but returns 403 on the custom domain | Domain restriction does not include the final hostname | Add the exact host in Static Forms settings |
| The inline script shows the failure panel | The API returned an error, CSP blocked connect-src, or another script intercepted submit |
Read the Network and Console tabs before changing code |
| Webflow has no copy of the submission | Custom action is enabled | This is expected; Webflow says Custom action bypasses its backend |
| The submission is recorded but no email arrives | Recipient delivery failed or the message was filtered | Check the Static Forms inbox, recipient settings, spam folder, and troubleshooting guide |
A CORS error and a form-action error are not the same problem. fetch() uses connect-src and may involve CORS. A normal browser form POST is governed by form-action; it does not become an AJAX request just because it submits to another domain. The CORS troubleshooting page has browser-console examples.
What changes on exported Webflow sites?
Webflow's export documentation says its native form processing does not follow an exported site. A third-party action is therefore required after you host the files elsewhere. Configure the action and method before export, then inspect the generated <form> element and test on the actual host.
Do not assume Webflow's reCAPTCHA or file-upload behavior survives export. Webflow's broader code export guide lists those native form features among the parts that do not work on an exported site. Reconfigure spam protection and uploads for the new processor.
A short launch checklist
Before sharing the contact page, confirm that:
- the published form uses
POST https://api.staticforms.dev/submit; - every visible control has the intended
name; apiKeyand an absoluteredirectToare present;- the custom domain passes a real submission;
- the message is recorded and the recipient email arrives;
- keyboard validation, honeypot behavior, and the error path were tested;
- your team knows Webflow no longer stores Custom action submissions.
The Webflow setup reference has the shorter configuration recipe, while form basics documents fields and response behavior. Keep those pages bookmarked. Product settings change more often than the Webflow design around them.
Related Articles
Add Email to a Replit Website Contact Form
Connect a Replit website contact form to email with plain HTML and React examples, safe key handling, publishing checks, spam controls, and fixes.
Make a Lovable Contact Form Send Real Email
Connect a Lovable contact form to real email with a copy-paste React example, safe key handling, spam controls, deployment tests, and troubleshooting.
Connect a Framer Form to Email and a Webhook
Connect a native Framer form to email and a webhook with Static Forms. Follow the field setup, delivery flow, test steps, spam settings, and fixes.




































