

Angular Contact Form Without a Backend: Reactive Forms Guide
Angular can validate a contact form in the browser, but it still needs somewhere to send the message. Building that receiver yourself means owning a public API route, email delivery, abuse controls, and logs for a feature that looked small on the mockup.
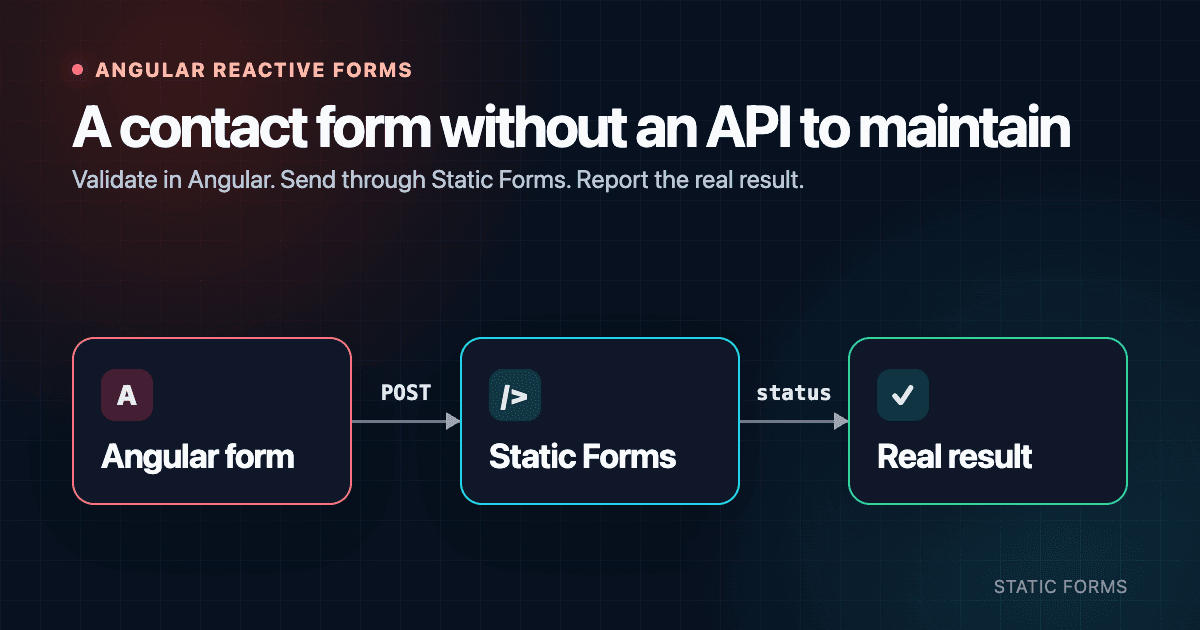
This tutorial uses Angular Reactive Forms for the interface and Static Forms for the receiver. The finished form validates three fields, posts through Angular's HttpClient, blocks duplicate clicks while the request is running, and announces the result without moving keyboard focus. You will not build or operate your own form API.
The example follows the current Angular Reactive Forms guide and the dedicated Static Forms Angular setup. It uses a standalone component and Angular's built-in control-flow syntax.
Set up the form destination
Create a form in Static Forms, then copy its form key. The key identifies where a submission belongs. It is designed to appear in browser code, so it is not the same kind of credential as an SMTP password or a private provider token.
This guide sends JSON to:
https://api.staticforms.dev/submitThe request includes the key as apiKey, which matches the current Static Forms API reference. Replace YOUR_STATIC_FORMS_KEY in the component below with the value from your dashboard.
The browser still calls an API, but it is not one you have to deploy or keep running. If your workflow needs a confidential credential or privileged database operation, put that work behind a server you control rather than adding the secret to Angular's compiled JavaScript.
Enable Angular's HTTP client
Add provideHttpClient() to the application configuration. Angular documents this provider in its current HttpClient setup guide.
// src/app/app.config.ts
import { provideHttpClient } from "@angular/common/http";
import { ApplicationConfig } from "@angular/core";

export const appConfig: ApplicationConfig = {
  providers: [provideHttpClient()],
};
If your existing app configuration already provides HttpClient, do not add a second provider just for this form.
Build the standalone contact form
Create a component with a typed Reactive Form. The validators give immediate feedback, while the submission handler decides when a request is allowed to leave the page.
// src/app/contact-form/contact-form.component.ts
import { HttpClient, HttpErrorResponse } from "@angular/common/http";
import { Component, inject } from "@angular/core";
import {
  NonNullableFormBuilder,
  ReactiveFormsModule,
  Validators,
} from "@angular/forms";
import { finalize } from "rxjs";

interface StaticFormsResponse {
  success: boolean;
  message: string;
}

type StatusKind = "success" | "error" | null;

@Component({
  selector: "app-contact-form",
  standalone: true,
  imports: [ReactiveFormsModule],
  templateUrl: "./contact-form.component.html",
  styleUrl: "./contact-form.component.css",
})
export class ContactFormComponent {
  private readonly fb = inject(NonNullableFormBuilder);
  private readonly http = inject(HttpClient);

  // This form identifier is expected to be visible in browser code.
  private readonly staticFormsKey = "YOUR_STATIC_FORMS_KEY";
  private readonly endpoint = "https://api.staticforms.dev/submit";

  readonly contactForm = this.fb.group({
    name: ["", [Validators.required, Validators.maxLength(100)]],
    email: ["", [Validators.required, Validators.email]],
    message: [
      "",
      [
        Validators.required,
        Validators.minLength(10),
        Validators.maxLength(5000),
      ],
    ],
    honeypot: [""],
  });

  submitting = false;
  statusKind: StatusKind = null;
  statusMessage = "";

  isInvalid(controlName: "name" | "email" | "message"): boolean {
    const control = this.contactForm.controls[controlName];
    return control.invalid && (control.dirty || control.touched);
  }

  onSubmit(): void {
    this.statusKind = null;
    this.statusMessage = "";

    if (this.contactForm.invalid) {
      this.contactForm.markAllAsTouched();
      this.statusKind = "error";
      this.statusMessage =
        "Please correct the highlighted fields and try again.";
      return;
    }

    this.submitting = true;
    this.statusMessage = "Sending your message...";

    const { name, email, message, honeypot } = this.contactForm.getRawValue();

    this.http
      .post<StaticFormsResponse>(
        this.endpoint,
        {
          apiKey: this.staticFormsKey,
          name,
          email,
          message,
          honeypot,
        },
        { timeout: 10_000 },
      )
      .pipe(finalize(() => (this.submitting = false)))
      .subscribe({
        next: (response) => {
          if (!response.success) {
            this.statusKind = "error";
            this.statusMessage =
              "Your message could not be sent. Please try again.";
            return;
          }

          this.statusKind = "success";
          this.statusMessage = "Thanks, your message was submitted.";
          this.contactForm.reset();
        },
        error: (error: HttpErrorResponse) => {
          this.statusKind = "error";

          this.statusMessage =
            error.status === 0
              ? "We could not reach the form service. Check your connection and try again."
              : error.status === 429
                ? "Too many requests were sent. Please wait and try again."
                : "Your message could not be sent. Please try again later.";
        },
      });
  }
}
HttpClient.post() returns an Observable. The request does not run until the code subscribes, a detail covered in Angular's HTTP request guide. The finalize() callback restores the button whether the request succeeds or fails.
Do not reset the form in finalize(). If the network fails, wiping a carefully written message is a particularly unfriendly way to handle it. This example resets only after the endpoint returns success: true.
Add labels, errors, and a status region
The template connects every visible label to its control. Invalid fields use aria-describedby to point at the relevant message, and the result lives in a status region that is present before its text changes.
<!-- src/app/contact-form/contact-form.component.html -->
<form
  [formGroup]="contactForm"
  (ngSubmit)="onSubmit()"
  [attr.aria-busy]="submitting"
  novalidate
>
  <div class="field">
    <label for="contact-name">Name</label>
    <input
      id="contact-name"
      type="text"
      formControlName="name"
      autocomplete="name"
      [attr.aria-invalid]="isInvalid('name') ? 'true' : null"
      [attr.aria-describedby]="isInvalid('name') ? 'name-error' : null"
    />

    @if (isInvalid('name')) {
    <p id="name-error" class="field-error">
      Enter your name (100 characters or fewer).
    </p>
    }
  </div>

  <div class="field">
    <label for="contact-email">Email</label>
    <input
      id="contact-email"
      type="email"
      formControlName="email"
      autocomplete="email"
      inputmode="email"
      [attr.aria-invalid]="isInvalid('email') ? 'true' : null"
      [attr.aria-describedby]="isInvalid('email') ? 'email-error' : null"
    />

    @if (isInvalid('email')) {
    <p id="email-error" class="field-error">Enter a valid email address.</p>
    }
  </div>

  <div class="field">
    <label for="contact-message">Message</label>
    <textarea
      id="contact-message"
      formControlName="message"
      rows="6"
      [attr.aria-invalid]="isInvalid('message') ? 'true' : null"
      [attr.aria-describedby]="
        isInvalid('message') ? 'message-error' : null
      "
    ></textarea>

    @if (isInvalid('message')) {
    <p id="message-error" class="field-error">
      Enter a message between 10 and 5,000 characters.
    </p>
    }
  </div>

  <div class="honeypot" aria-hidden="true">
    <label for="contact-honeypot">Leave this field empty</label>
    <input
      id="contact-honeypot"
      type="text"
      formControlName="honeypot"
      tabindex="-1"
      autocomplete="off"
    />
  </div>

  <button type="submit" [disabled]="submitting">
    {{ submitting ? 'Sending...' : 'Send message' }}
  </button>

  <div role="status" aria-live="polite" aria-atomic="true">
    @if (statusMessage) {
    <p
      [class.success]="statusKind === 'success'"
      [class.form-error]="statusKind === 'error'"
    >
      {{ statusMessage }}
    </p>
    }
  </div>
</form>
A status role is appropriate for a non-urgent form result. MDN notes that role="status" has an implicit polite live region. Keeping its container mounted gives assistive technology a region to observe before Angular inserts the message.
The disabled button also prevents an impatient double-click from creating two simultaneous requests. aria-busy exposes the pending state on the form, while the visible button copy changes to "Sending...".
Style the states without hiding the honeypot incorrectly
Use your own layout tokens for the finished design. These rules cover the behavior that is easy to lose during styling:
/* src/app/contact-form/contact-form.component.css */
:host {
  display: block;
  max-width: 42rem;
}

form {
  display: grid;
  gap: 1.25rem;
}

.field {
  display: grid;
  gap: 0.4rem;
}

input,
textarea,
button {
  font: inherit;
}

input,
textarea {
  border: 1px solid #64748b;
  border-radius: 0.5rem;
  padding: 0.75rem;
}

input:focus-visible,
textarea:focus-visible,
button:focus-visible {
  outline: 3px solid #2563eb;
  outline-offset: 2px;
}

[aria-invalid="true"] {
  border-color: #b91c1c;
}

.field-error,
.form-error {
  color: #b91c1c;
}

.success {
  color: #166534;
}

button {
  justify-self: start;
  min-height: 44px;
  padding: 0.7rem 1rem;
}

button:disabled {
  cursor: wait;
  opacity: 0.7;
}

.honeypot {
  position: absolute;
  width: 1px;
  height: 1px;
  overflow: hidden;
  clip: rect(0 0 0 0);
  clip-path: inset(50%);
  white-space: nowrap;
}
Do not change the honeypot input to type="hidden". Bots often ignore hidden fields. Static Forms' honeypot documentation uses a text input removed from normal interaction instead. The field is skipped by keyboard navigation and marked hidden for assistive technology, but a basic form-filling bot can still encounter it.
A honeypot is one filter, not proof that all spam will disappear. Review the other form security options if a public form starts attracting abuse.
Render the component
Import the standalone component wherever you want the form to appear:
import { Component } from "@angular/core";

import { ContactFormComponent } from "./contact-form/contact-form.component";

@Component({
  selector: "app-root",
  standalone: true,
  imports: [ContactFormComponent],
  template: `
    <main>
      <h1>Contact us</h1>
      <app-contact-form />
    </main>
  `,
})
export class App {}
Run the app, leave each field empty, and submit. All three errors should appear. Then enter a malformed email and confirm that the email message remains. Correct the fields and watch the button and status region while the request runs.
Test the deployed form, not only localhost
A successful Angular build proves the template and TypeScript compile. It does not prove that the deployed origin, form destination, spam settings, or email delivery behave as expected.
Use a unique message such as Angular production check 2026-08-25 0816Z, then verify these boundaries separately:
- The browser sends one POST to
https://api.staticforms.dev/submit. - The response has a successful HTTP status and a JSON body with
success: true. - The matching message appears in the Static Forms inbox.
- If email delivery is configured, the matching message reaches the intended mailbox.
The API accepting a submission and an email arriving are separate events. Do not make the UI promise "Email delivered" based only on the POST response. "Message submitted" is accurate.
If the browser reports a cross-origin failure, inspect the Network panel before changing Angular code. Record the request URL, method, origin, preflight response, and response headers. Static Forms documents the expected behavior in its CORS troubleshooting guide.
Map other failures to the response you actually received:
400usually means the payload is missing a required value or has an invalid field.401or403points to the form key or a configured access rule.429means the request hit a rate limit. Wait before trying again.- status
0in Angular'sHttpErrorResponseusually means the browser could not complete the network request.
Do not log names, email addresses, message bodies, or the full response payload to a public browser analytics service. The status code and a local test identifier are usually enough to diagnose a failed test.
Production checklist
Before linking the form from a real campaign or navigation menu, check the boring details. They are the ones that tend to break contact forms:
- Replace the placeholder form key in the deployed build.
- Keep labels, stable IDs, autocomplete hints, and visible focus styles.
- Submit once with invalid fields and once with valid test data.
- Confirm the pending button cannot send a duplicate request.
- Verify the polite status announcement with a screen reader.
- Test the exact production URL on a narrow viewport and with keyboard navigation.
- Confirm the submission in the product inbox, then check email delivery separately.
- Remove the test submission when you no longer need it.
The Angular code is now responsible for the interaction, validation, and honest feedback. Static Forms handles the public receiver. That leaves one production form to test instead of a small API service to maintain.
Related Articles
Build a Custom Shopify Contact Form Section in Liquid
Build a reusable Shopify contact form section in Liquid. Add custom fields, accessible errors, native hCaptcha, theme settings, and a storefront test.
Use a Custom Squarespace Form Without Losing Your Styling
Add a custom Squarespace contact form that keeps your site styling. Use tested HTML, a thank-you page, accessible focus states, and production checks.
Vercel Static Site Contact Form: Plain HTML Tutorial
Build a working contact form for a static Vercel site with one HTML file. Add accessible status feedback, preview testing, spam controls, and production checks.







































