

HTML form attribute: include fields outside the form
A contact form can submit a name and email while silently leaving out the message. If the message field sits outside the <form> in the rendered HTML, visual proximity is not enough: it needs a form owner.
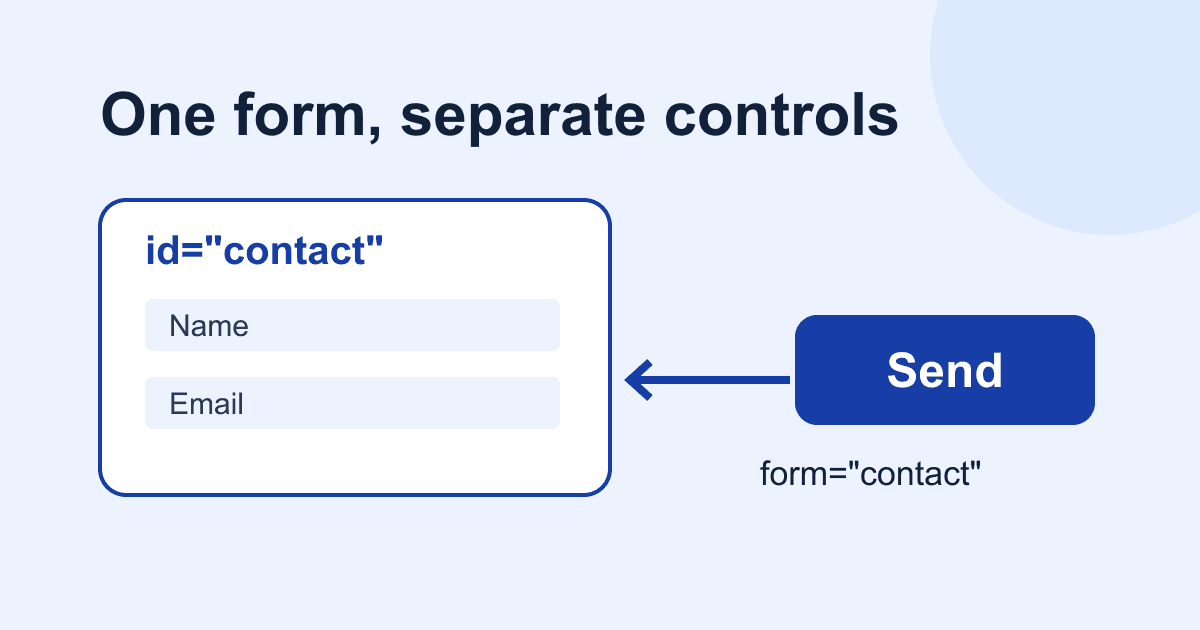
The HTML form attribute connects an external control to a form's ID. It works on inputs, textareas, selects, and submit buttons. The browser then includes eligible controls in the payload and runs their native validation, even when they are elsewhere in the page layout.
Our button element guide covers external buttons among the general button attributes. This tutorial focuses on the less obvious failure: associating the button correctly while leaving the neighboring fields unowned. You will build a contact page with an external message field, inspect the actual ownership and payload, and test both keyboard and pointer submission. The endpoint example uses Static Forms, but the ownership rules belong to HTML.
Connect the button to the form's ID
The value of form is an ID, not a CSS selector. Use form="contact", not form="#contact". The target must be a form in the same document, with a unique ID.
An external input or textarea needs its own form attribute as well. Associating the button does not automatically associate the fields next to it. The browser submits controls owned by the form, not everything visually contained in the same card.
The HTML form attribute reference explains this ownership model. A control inside a form normally belongs to that ancestor; an explicit form attribute can override that relationship.
Build a contact page with external controls
Save this as contact.html. It needs no build step and no JavaScript. All visible controls have labels, required fields are identified in text, and the DOM order follows the reading order.
<!doctype html>
<html lang="en">
<head>
  <meta charset="utf-8">
  <meta name="viewport" content="width=device-width, initial-scale=1">
  <title>Contact the team</title>
  <style>
    * { box-sizing: border-box; }
    body {
      margin: 2rem auto;
      padding: 0 1rem;
      max-width: 36rem;
      font: 1rem/1.6 system-ui, sans-serif;
      color: #172033;
      background: #fff;
    }
    label { display: block; margin-top: 1rem; }
    input, textarea, button { font: inherit; }
    input, textarea {
      width: 100%;
      padding: .6rem;
      border: 1px solid #64748b;
      border-radius: .3rem;
    }
    textarea { resize: vertical; }
    button {
      margin-top: 1rem;
      padding: .65rem 1rem;
      color: #fff;
      background: #173da6;
      border: 0;
      border-radius: .3rem;
    }
    :focus-visible { outline: 3px solid #b45309; outline-offset: 3px; }
  </style>
</head>
<body>
  <main>
    <h1>Contact the team</h1>
    <p>All fields are required. Do not include passwords or payment details.</p>

    <form id="contact"
          action="https://api.staticforms.dev/submit"
          method="post">
      <input type="hidden" name="apiKey" value="YOUR_API_KEY">
      <label for="name">Name (required)</label>
      <input id="name" name="name" autocomplete="name" required>
      <label for="email">Email (required)</label>
      <input id="email" name="email" type="email"
             autocomplete="email" required>
    </form>

    <section aria-labelledby="message-heading">
      <h2 id="message-heading">Your message</h2>
      <label for="message">Message (required)</label>
      <textarea id="message" name="message" form="contact"
                rows="5" required></textarea>
    </section>

    <footer>
      <button id="send" type="submit" form="contact">
        Send message
      </button>
    </footer>
  </main>
</body>
</html>
Replace YOUR_API_KEY with the form submission key from your Static Forms dashboard. The quick-start guide covers account setup and the endpoint. This key is deliberately present in client HTML; do not replace it with a server credential, webhook secret, or deployment token.
The example is a browser-ownership baseline, not a complete spam-control setup. Before exposing it publicly, configure the account's allowed domains and the spam protection you need. If the form requires CAPTCHA, include that provider's widget and response field according to the documentation. Every required CAPTCHA response control must also belong to the same form.
The native submission navigates away from the page. If you need a branded confirmation page, add the documented redirectTo hidden field inside the form with your deployed HTTPS thank-you URL. Do not add a URL that does not exist yet, and do not make the thank-you page claim that an email has arrived.
Check ownership before debugging the backend
Open the page's developer console and run this diagnostic. It reads the form locally and sends no request:
const form = document.getElementById("contact");
const message = document.getElementById("message");
const send = document.getElementById("send");

console.log(message.form === form);
console.log(send.form === form);
console.log(Array.from(form.elements, control => control.id || control.name));
console.log(Array.from(new FormData(form).entries()));
The first two lines should print true. The controls collection should include message and send, even though neither is a descendant of the form. The entry list should include apiKey, name, email, and message.
Do not paste this console output into a public issue with real customer data. Use invented test values, then clear the console before working with actual messages.
new FormData(form) constructs data; it does not validate the form or send it. Empty required values can therefore appear in the diagnostic. Activate the real submit button to test validation.
Keep submission behavior native
Click Send message with the email empty. The browser should focus an invalid required control and block submission. Fill the fields and try again. The external message textarea participates in validation because it belongs to the form, not because of its position on the page.
For a keyboard test, tab to the button and press Enter or Space. Keep the focus outline visible. Avoid moving the footer visually above the fields with CSS while leaving it at the end of the DOM; the resulting focus order is harder to follow.
If a script genuinely needs to initiate submission, use the approach in requestSubmit() versus submit(). A normal button needs neither method. Adding a click listener just to call a submission method can create a second submission path.
Our example button has no name, so it contributes no name/value pair to the request. If you later add named submit buttons, a native submission includes the activated button's contribution. A JavaScript handler that builds its own data should use new FormData(form, event.submitter) when it needs that contribution; see the FormData constructor documentation.
Common failures and their fixes
The button does nothing. Check its type, the exact form attribute value, and send.form. A typo, a missing target form, or type="button" can explain it. Duplicate IDs make ownership unreliable; remove them rather than compensating with another selector.
The message disappears from the payload. Check that the textarea has both name="message" and form="contact". Also check whether it is disabled. Disabled and readonly controls have different submission behavior.
A whole external fieldset is missing. The form attribute is not inherited. Putting it on a fieldset associates the fieldset itself, not every nested input. Put it on each external control, or move those controls inside the form.
A component changes the destination. Inspect the final rendered HTML, including the button. Submitter attributes such as formaction and formmethod can override the form's submission settings. Remove accidental overrides; keep deliberate ones under review.
The button is in an iframe. An ordinary form attribute does not connect controls across documents. Render the control and form together instead of expecting an ID in the parent page to connect them.
Do not nest forms to solve a layout problem. The HTML standard's form association rules describe why parsing and ownership are more complicated in malformed markup.
Test the deployed page once
Deploy the file with your normal static host, replace the placeholder key, and confirm the production origin is allowed. Send one clearly marked test message using an address you control. Inspect the browser request to confirm the external message field is included, then check the Static Forms dashboard and the intended mailbox separately.
A successful browser submission is not proof of email delivery. If the request appears correct but no message arrives, follow the email delivery troubleshooting guide rather than rewriting the external button.
The code above was checked for ownership, required-field validation, pointer and keyboard submission, and payload contents in a browser with submission intercepted locally. That test did not send email. Your deployed form still needs its own delivery check and a review with the assistive technologies your audience uses.
Sources
- MDN: HTML form attribute, for explicit owners, external controls, and non-inheritance.
- WHATWG: association of controls and forms, for the normative ownership rules.
- MDN: FormData constructor, for successful controls and the optional submitter.
- Static Forms API reference, for the submission endpoint and request fields.
Related Articles
Disabled vs readonly: why form fields go missing
Learn why disabled fields disappear from HTML form submissions, when readonly keeps a value, and how to inspect the exact payload with a working browser demo.
Add browser details to a bug report form safely
Build a bug report form that captures page, viewport, language, time zone, and user agent while letting users review the details before sending.
requestSubmit() vs submit(): Validate Forms Before Sending
Learn why requestSubmit() runs browser validation and submit handlers while submit() skips them, with a tested contact form pattern and debugging checks.




































