

Add a Contact Form to Hexo Without a Backend
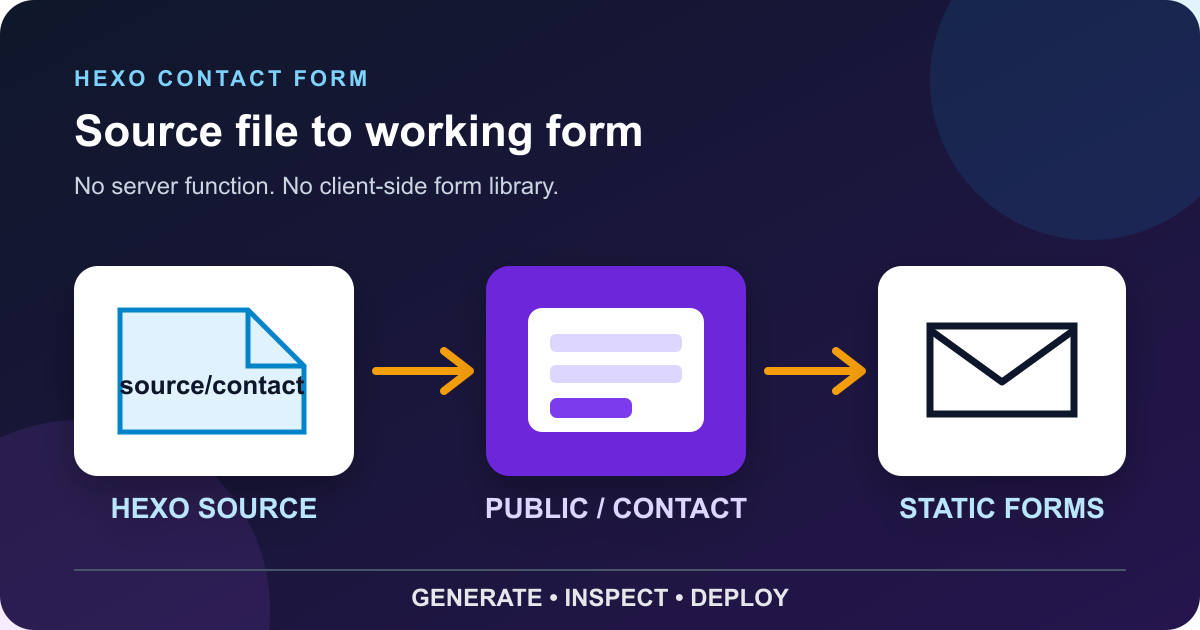
A Hexo site can publish a working contact form without adding a server function or client-side form library. The useful part is choosing a file that survives theme upgrades, then checking the HTML Hexo actually generated instead of assuming the source file reached production unchanged.
This guide builds two standalone pages: /contact/ holds the form and /thanks/ confirms that the form endpoint accepted it. The form uses a normal HTML POST, so it still works when JavaScript fails or is disabled.
Why this Hexo setup avoids the theme
Hexo separates site content under source from theme templates and theme assets. Files in the site-level source directory become part of the generated site, while theme templates live under the active theme's layout directory.[3][5]
That distinction matters during upgrades. Editing a theme's templates may be the right choice for a site-wide component, but it ties your contact page to that theme and its template engine. Current Hexo documentation describes Nunjucks as the default while also supporting engines such as EJS and Pug through renderer plugins.[5] A snippet written for one engine is not portable to every Hexo site.
For one contact page, a standalone HTML page is easier to audit. Hexo supports layout: false, which skips the theme layout for that page.[1] You lose the automatic header and footer, but you gain a complete document whose form behavior does not depend on theme updates.
Create the contact page
From the root of your Hexo project, create the directories:
mkdir -p source/contact source/thanksHexo normally reads content from source and writes the generated site to public.[3][4] If your _config.yml changes source_dir or public_dir, use those configured paths instead.
Create source/contact/index.html with this complete document:
---
layout: false
---
<!doctype html>
<html lang="en">
<head>
  <meta charset="utf-8">
  <meta name="viewport" content="width=device-width, initial-scale=1">
  <title>Contact</title>
  <meta name="description" content="Send us a private message.">
  <style>
    :root {
      color-scheme: light dark;
      font-family: system-ui, sans-serif;
    }
    body {
      margin: 0;
      color: #172033;
      background: #f6f7fb;
    }
    .contact-shell {
      width: min(42rem, calc(100% - 2rem));
      margin: 3rem auto;
      padding: clamp(1.25rem, 4vw, 2rem);
      box-sizing: border-box;
      background: #ffffff;
      border: 1px solid #d8dce7;
      border-radius: 1rem;
      box-shadow: 0 1rem 3rem rgb(26 31 44 / 10%);
    }
    .field {
      margin-top: 1.25rem;
    }
    label {
      display: block;
      margin-bottom: 0.4rem;
      font-weight: 700;
    }
    input,
    textarea,
    button {
      width: 100%;
      box-sizing: border-box;
      font: inherit;
    }
    input,
    textarea {
      padding: 0.75rem;
      color: #172033;
      background: #ffffff;
      border: 1px solid #7b8499;
      border-radius: 0.5rem;
    }
    textarea {
      min-height: 11rem;
      resize: vertical;
    }
    button {
      margin-top: 1.5rem;
      padding: 0.85rem 1rem;
      color: #ffffff;
      background: #6d28d9;
      border: 0;
      border-radius: 0.5rem;
      font-weight: 700;
      cursor: pointer;
    }
    :focus-visible {
      outline: 3px solid #f59e0b;
      outline-offset: 3px;
    }
    .help {
      display: block;
      margin-top: 0.4rem;
      color: #4b5568;
    }
    .website-check {
      position: absolute;
      left: -10000px;
      width: 1px;
      height: 1px;
      overflow: hidden;
    }
    @media (prefers-color-scheme: dark) {
      body { color: #f4f4f5; background: #111827; }
      .contact-shell { background: #1f2937; border-color: #4b5563; }
      input, textarea { color: #f4f4f5; background: #111827; border-color: #9ca3af; }
      .help { color: #d1d5db; }
    }
  </style>
</head>
<body>
  <main class="contact-shell">
    <h1>Contact us</h1>
    <p>Send a private message. Fields marked required must be completed.</p>

    <form action="https://api.staticforms.dev/submit" method="POST">
      <input type="hidden" name="apiKey" value="YOUR_API_KEY">
      <input
        type="hidden"
        name="redirectTo"
        value="https://YOUR-DOMAIN.example/thanks/"
      >

      <div class="website-check" aria-hidden="true">
        <label for="website-honeypot">Leave this field empty</label>
        <input
          id="website-honeypot"
          name="website_honeypot"
          type="text"
          tabindex="-1"
          autocomplete="off"
        >
      </div>

      <div class="field">
        <label for="contact-name">Name</label>
        <input id="contact-name" name="name" type="text" autocomplete="name" required>
      </div>

      <div class="field">
        <label for="contact-email">Email</label>
        <input id="contact-email" name="email" type="email" autocomplete="email" required>
      </div>

      <div class="field">
        <label for="contact-message">Message</label>
        <textarea
          id="contact-message"
          name="message"
          minlength="20"
          maxlength="5000"
          aria-describedby="message-help"
          required
        ></textarea>
        <small id="message-help" class="help">Use at least 20 characters. Do not send passwords or payment details.</small>
      </div>

      <button type="submit">Send message</button>
    </form>
  </main>
</body>
</html>
Replace two values before building:
YOUR_API_KEYwith the form key from your Static Forms account;https://YOUR-DOMAIN.example/thanks/with the final HTTPS URL of your thank-you page.
If you have not created a form yet, follow the Static Forms quick start first. The fixed endpoint, POST method, hidden apiKey, and named fields match the current form basics contract.[9] The form key is visible in the published HTML because the browser has to send it. Treat it as a public form identifier, not as a password.
Every visible control has a visible label connected with for and id. That association is the pattern W3C recommends for broad assistive-technology support.[12] Native required, type="email", and length constraints help visitors catch simple mistakes, but browser validation is not a security boundary.
Add the thank-you page
Create source/thanks/index.html:
---
layout: false
---
<!doctype html>
<html lang="en">
<head>
  <meta charset="utf-8">
  <meta name="viewport" content="width=device-width, initial-scale=1">
  <title>Message accepted</title>
  <style>
    body {
      max-width: 42rem;
      margin: 4rem auto;
      padding: 0 1rem;
      font: 1.1rem/1.6 system-ui, sans-serif;
    }
    a:focus-visible { outline: 3px solid #f59e0b; outline-offset: 3px; }
  </style>
</head>
<body>
  <main>
    <h1>Your message was accepted</h1>
    <p>If it needs a reply, we will respond by email.</p>
    <p><a href="/">Return to the home page</a></p>
  </main>
</body>
</html>
The wording says "accepted" on purpose. Reaching this page shows that the endpoint accepted the browser request and issued the redirect. It does not prove that an email reached an inbox or that a person read it. Clear, specific completion feedback is part of W3C's form-notification guidance.[13]
Generate the site and inspect the output
Run a clean build:
npx hexo clean
npx hexo generate
hexo clean removes the cache and generated public directory; hexo generate rebuilds the static files.[2][7] Inspect the output before deployment:
test -f public/contact/index.html
test -f public/thanks/index.html
grep -n 'https://api.staticforms.dev/submit' public/contact/index.html
grep -n 'name="apiKey"' public/contact/index.html
Open public/contact/index.html in a browser too. Confirm that the heading, labels, focus outline, required-field errors, dark color scheme, and narrow-screen layout are readable. Do not submit from a file:// URL because origin checks and redirects differ from a deployed HTTPS site.
If your project uses different output settings, check _config.yml. Hexo documents public_dir as the generated-site directory and skip_render as the setting for copying matched source files without rendering.[4] This example should be rendered so Hexo removes its front matter; do not add it to skip_render unless you also remove the front matter yourself.
Deploy, then test one real submission
Hexo deployment depends on the plugin and host configured for the project. The portable artifact is the generated public directory, which can be copied to a static host even when you do not use hexo deploy.[8]
After deployment:
- Open the final
/contact/URL in a private browser window. - Try submitting with empty required fields. The browser should stop before sending.
- Enter an invalid email address. Focus should move to the email field or its native error should appear.
- Enter safe test values and submit once.
- Confirm that the browser reaches your exact HTTPS
/thanks/URL. - Check the Static Forms inbox or delivery logs for the matching test submission.
- Repeat at a mobile width and with keyboard-only navigation.
A successful redirect proves endpoint acceptance. The inbox or delivery log is the separate check for storage and delivery status.
Add spam and origin controls deliberately
The example includes a visually hidden text field whose name contains honeypot. Static Forms recognizes honeypot field names case-insensitively and silently rejects a submission when the trap contains a value.[9][10] It is a cheap filter for unsophisticated bots, not complete spam protection. The honeypot setup guide covers the same server-side behavior in more detail.
Test both paths after deployment: leave the trap empty for a normal test, then deliberately populate it with browser developer tools and confirm that no ordinary submission appears. The current honeypot documentation recommends this paired test and warns that more capable bots can bypass the technique.[10]
Domain restriction can limit browser submissions to an allowlist checked against Origin or Referer.[11] Add your production hostname without a protocol or path. The domain restriction guide shows the current allowlist format. If you use preview deployments, decide whether each preview hostname belongs on the allowlist rather than weakening the rule for every origin. Privacy tools and reverse proxies can remove those headers, so test your real deployment before enforcing a strict policy.
Do not put secrets in hidden inputs, source files, or front matter. Visitors can inspect all three once the site is public.
Common Hexo failures
The contact page returns 404
Check for public/contact/index.html after generation. If it is missing, confirm the file is under the configured site-level source_dir, not themes/<theme>/source. Also check exclude, ignore, and custom generator settings in _config.yml.[3][4]
The front matter appears as text
The file may have been copied without rendering. Remove it from skip_render, regenerate, and inspect the first lines of public/contact/index.html. A deployed page must start with the document markup, not ---.
The page has no site navigation
That is expected because layout: false bypasses the theme. If matching the theme matters more than isolation, move the form markup into a page template or partial for your theme's actual engine. Hexo's standalone pages use the theme's page template, with index as a fallback, and partials are the documented reuse mechanism.[6] Make that a deliberate theme customization and keep it in version control.
The browser submits but no fields arrive
Only controls with name attributes are included in the form submission.[9] Inspect the generated HTML, not just the source file, and confirm that apiKey, name, email, and message remain present.
The redirect goes to the wrong host
Use the full production HTTPS URL in redirectTo. Preview hosts, custom base paths, and a changed Hexo url setting can make copied URLs stale. Test the exact deployed form after every domain change.
The form works locally but production rejects it
A domain allowlist may not include the production or preview hostname, or a proxy may have changed the relevant request headers.[11] Compare the configured hostname with the browser's address bar and inspect the failed request before changing security settings.
When a theme partial is the better choice
Use the standalone page when you want a small, auditable contact route with minimal moving parts. Use a theme page template or partial when the contact page must share your site's navigation, design tokens, analytics hooks, or localization system.
If you choose the theme route, identify the template engine from the active theme's files rather than copying an old EJS snippet into a Nunjucks theme. Hexo selects the template engine from the file extension and renderer plugin.[5] Keep the form's endpoint and field names unchanged, preserve visible labels and focus styles, and inspect the generated page again after theme upgrades. The existing Hugo contact form guide is useful if you maintain both generators, but its partial syntax does not transfer to Hexo.
The final check is simple: the source file exists, public/contact/index.html contains the expected form, the deployed page sends one safe test, the thank-you page appears, and the matching submission is visible in the product. That sequence catches more real mistakes than another layer of client-side JavaScript.
Sources
[1] https://hexo.io/docs/writing — Hexo: Writing
[2] https://hexo.io/docs/commands — Hexo: Commands
[3] https://hexo.io/docs/setup — Hexo: Setup
[4] https://hexo.io/docs/configuration — Hexo: Configuration
[5] https://hexo.io/docs/themes — Hexo: Themes
[6] https://hexo.io/docs/templates — Hexo: Templates
[7] https://hexo.io/docs/generating — Hexo: Generating
[8] https://hexo.io/docs/one-command-deployment — Hexo: One-command deployment
[9] https://www.staticforms.dev/docs/forms/form-basics — Static Forms: Form basics
[10] https://www.staticforms.dev/docs/forms/security/honeypot — Static Forms: Honeypot field
[11] https://www.staticforms.dev/docs/forms/security/domain-restriction — Static Forms: Domain restriction
[12] https://www.w3.org/WAI/tutorials/forms/labels — W3C WAI: Labeling controls
[13] https://www.w3.org/WAI/tutorials/forms/notifications — W3C WAI: User notification
Related Articles
Add a Contact Form to Neocities Without PHP
Add a working contact form to Neocities with plain HTML, accessible labels, spam protection, a thank-you page, and a practical test checklist.
Add a Contact Form to Ghost Without Editing Your Theme
Add a working contact form to Ghost with an HTML card, accessible fields, a thank-you page, spam protection, and a published-page test plan.
Build a Vite Contact Form Without a Backend
Build a Vite contact form with native validation, a hosted endpoint, safe environment variables, clear status messages, and production testing.