

Add a Contact Form to Eleventy Without Writing a Backend
Eleventy turns templates into static HTML. That keeps an 11ty site fast and easy to deploy, but the generated site cannot process a contact form or send an email by itself.
You could add a serverless function and an email service. For a basic contact form, a hosted form endpoint is a smaller system to maintain. The visitor submits directly to Static Forms, which validates the request, stores the submission, and sends the notification email.
This guide gives you:
- a complete Nunjucks contact-page template;
- a custom thank-you page;
- honeypot spam protection;
- deployment and production test steps;
- fixes for common Eleventy form problems.
No client-side JavaScript is required.
How it works
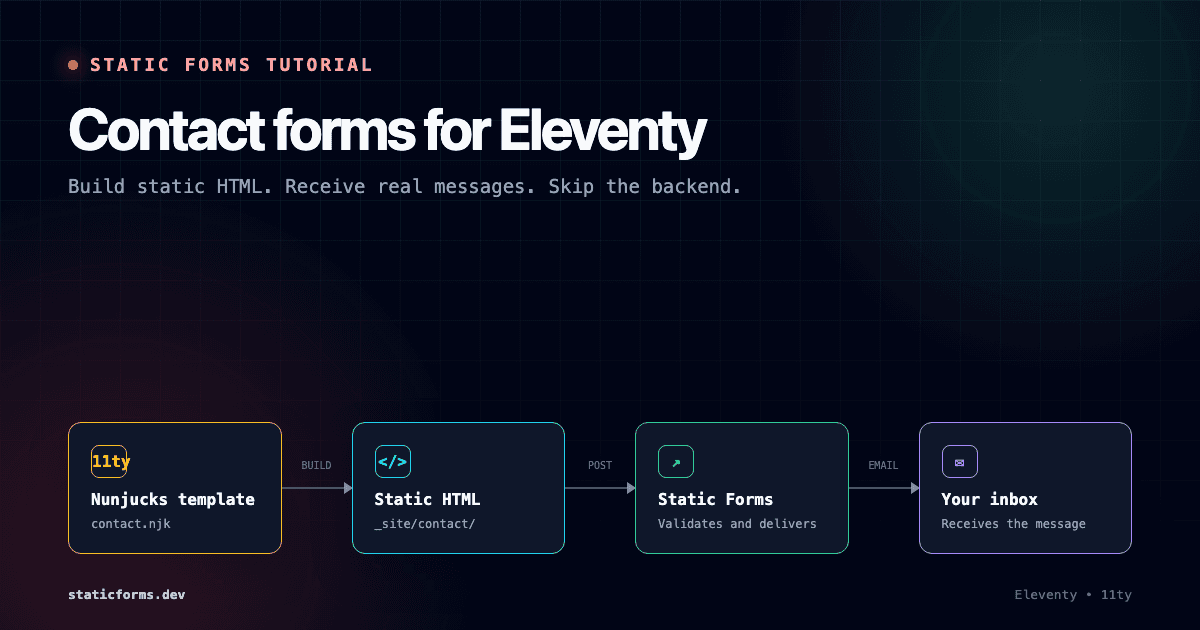
The submission path is short:
- Eleventy builds
contact.njkinto static HTML. - Your host serves the generated contact page.
- The browser posts the fields to
https://api.staticforms.dev/submit. - Static Forms delivers the message to your inbox and redirects the visitor to your thank-you page.
The form works on any host that can serve an Eleventy build, including Cloudflare Pages, Netlify, Vercel, GitHub Pages, and a regular web server.
What you need
Before editing the site, make sure you have:
- an existing Eleventy project;
- a Static Forms account;
- a form API key from the Static Forms dashboard;
- the production URL where the Eleventy site will be deployed.
The form API key appears in the generated HTML. That is expected for a browser-submitted form. Treat it as a form identifier rather than a server secret. You can prevent other websites from using it by enabling domain restriction.
Step 1: create the Eleventy contact template
Create contact.njk in your Eleventy input directory. Many projects use the repository root or a folder such as src for input files.
If your project already has a base layout, use this page template:
---
layout: layouts/base.njk
title: Contact us
description: Send our team a message.
permalink: /contact/index.html
---

<section class="contact-card" aria-labelledby="contact-heading">
  <h1 id="contact-heading">Contact us</h1>
  <p>Send a message and we will reply by email.</p>

  <form action="https://api.staticforms.dev/submit" method="POST">
    <input type="hidden" name="apiKey" value="YOUR_API_KEY" />
    <input type="hidden" name="replyTo" value="@" />
    <input
      type="hidden"
      name="redirectTo"
      value="https://example.com/thank-you/"
    />

    <div class="honeypot" aria-hidden="true">
      <label for="website">Leave this field empty</label>
      <input
        id="website"
        type="text"
        name="honeypot"
        tabindex="-1"
        autocomplete="off"
      />
    </div>

    <div class="field">
      <label for="name">Name</label>
      <input id="name" name="name" type="text" autocomplete="name" required />
    </div>

    <div class="field">
      <label for="email">Email</label>
      <input id="email" name="email" type="email" autocomplete="email" required />
    </div>

    <div class="field">
      <label for="subject">Subject</label>
      <input id="subject" name="subject" type="text" />
    </div>

    <div class="field">
      <label for="message">Message</label>
      <textarea id="message" name="message" rows="7" required></textarea>
    </div>

    <button type="submit">Send message</button>
  </form>
</section>
Replace:
YOUR_API_KEYwith the key shown for this form in Static Forms;https://example.com/thank-you/with the absolute production URL of your thank-you page.
The permalink front matter makes the output path predictable. Eleventy will generate _site/contact/index.html when _site is your configured output directory.
What the hidden fields do
The apiKey field associates the submission with your Static Forms form. replyTo set to @ tells Static Forms to use the submitted email value as the Reply-To address, so replying to the notification reaches the visitor.
The honeypot is an ordinary text field moved out of view. Basic bots often fill it, while a person does not. Static Forms silently rejects submissions when the honeypot field contains a value. The honeypot guide explains how to test it.
Step 2: style the form
Add these rules to your existing stylesheet:
.contact-card {
  width: min(100%, 42rem);
  margin-inline: auto;
  padding: clamp(1.5rem, 5vw, 3rem);
  background: #ffffff;
  border: 1px solid #e5e7eb;
  border-radius: 1rem;
  box-shadow: 0 1rem 3rem rgb(15 23 42 / 8%);
}

.field {
  margin-top: 1.25rem;
}

.field label {
  display: block;
  margin-bottom: 0.4rem;
  font-weight: 650;
}

.field input,
.field textarea,
.contact-card button {
  box-sizing: border-box;
  width: 100%;
  font: inherit;
}

.field input,
.field textarea {
  padding: 0.8rem;
  color: #111827;
  background: #ffffff;
  border: 1px solid #9ca3af;
  border-radius: 0.5rem;
}

.field input:focus,
.field textarea:focus {
  outline: 3px solid rgb(254 91 91 / 25%);
  border-color: #d93636;
}

.field textarea {
  resize: vertical;
}

.contact-card button {
  margin-top: 1.5rem;
  padding: 0.85rem 1rem;
  color: #ffffff;
  background: #d93636;
  border: 0;
  border-radius: 0.5rem;
  font-weight: 700;
  cursor: pointer;
}

.contact-card button:hover {
  background: #b91c1c;
}

.honeypot {
  position: absolute;
  left: -10000px;
  width: 1px;
  height: 1px;
  overflow: hidden;
}
Do not remove the label elements to make the design shorter. Placeholders disappear while a person is typing and do not replace accessible labels.
If the stylesheet sits outside Eleventy's input directory or uses a path that Eleventy does not copy automatically, configure it as a passthrough copy. Then confirm the final CSS file exists inside the generated output directory.
Step 3: add the thank-you page
Create thank-you.njk in the same input directory:
---
layout: layouts/base.njk
title: Message received
permalink: /thank-you/index.html
eleventyExcludeFromCollections: true
---

<section aria-labelledby="thank-you-heading">
  <h1 id="thank-you-heading">Thanks, your message was sent.</h1>
  <p>We will reply as soon as we can.</p>
  <p><a href="/">Return to the home page</a></p>
</section>
eleventyExcludeFromCollections keeps the utility page out of collections that automatically generate post lists or navigation. Your project may handle navigation separately, so check the generated menu before deploying.
A dedicated thank-you URL is also useful for analytics. Count a view of /thank-you/ as a completed form submission, while remembering that a visitor can open the URL directly.
Step 4: build and inspect the generated HTML
Run the build command used by your project. A standard Eleventy project commonly uses:
npx @11ty/eleventyFor a local development server:
npx @11ty/eleventy --serveEleventy configuration differs between projects. Check the dir.input and dir.output values in your Eleventy configuration file if the pages appear in an unexpected directory.
Before deploying, inspect the generated contact page and confirm that:
YOUR_API_KEYis no longer present;- the form action is exactly
https://api.staticforms.dev/submit; - the method is
POST; - the thank-you URL points to production;
- every visible input has a unique
name; - the stylesheet loads from the generated site.
Avoid inserting the API key through a runtime environment variable on the hosting platform unless your build command actually reads that variable. Eleventy runs at build time. A variable that is configured but never referenced by the build will not change the generated HTML.
Step 5: deploy and test the production page
Deploy the same output directory you inspected locally. With the default configuration, this is usually _site.
Run one complete test from the public URL:
- Open
/contact/in a private browser window. - Submit a recognizable message such as
Eleventy production form test. - Confirm the browser reaches
/thank-you/. - Check that the submission appears in the Static Forms inbox.
- Confirm the notification reaches the recipient email.
- Reply to the notification and verify that the submitted address is used.
- Repeat once on a phone or narrow browser window.
Testing only on localhost misses problems caused by production domain restrictions, Content Security Policy headers, incorrect output directories, and stale deployments.
Restrict submissions to your domain
Once the production form works, open the form's Security settings and add the site's hostname without a protocol or path:
example.comAdd the host-provided domain too if people can access it directly, for example:
example-project.pages.devIf you enable domain restriction before local testing is finished, allow localhost temporarily. Remove access for unused preview hostnames after the site is stable.
Common Eleventy contact-form problems
| Symptom | Likely cause | What to check |
|---|---|---|
/contact/ returns 404 |
The file is outside the Eleventy input directory, ignored, or has a different permalink | Inspect Eleventy configuration and confirm _site/contact/index.html exists |
| The page loads without styles | The stylesheet was not copied into the output | Add a passthrough-copy rule and inspect the generated CSS URL |
| The API reports an invalid key | The placeholder survived the build or the key belongs to another form | Search the generated HTML for YOUR_API_KEY and copy the current key from the dashboard |
| The form works locally but fails in production | Domain restriction does not include the production or preview hostname | Add each approved hostname without https:// |
| The thank-you page returns 404 | redirectTo and the Eleventy permalink do not match |
Compare the absolute redirect URL with the generated output path |
| A field is missing from the email | The input has no name, or two controls reuse the same name |
Give each submitted field a stable, unique name |
| The browser reports a CSP violation | The site's form-action policy blocks the external endpoint |
Allow https://api.staticforms.dev in the production CSP |
| Spam gets through | Honeypots mainly stop basic bots | Add Cloudflare Turnstile, hCaptcha, reCAPTCHA, or ALTCHA |
If your site has a strict Content Security Policy
A Content Security Policy can prevent the browser from sending the form even when the markup is correct. If the console mentions a form-action violation, allow the Static Forms endpoint:
Content-Security-Policy: default-src 'self'; form-action 'self' https://api.staticforms.devMerge that source into the policy you already use. Do not replace an existing policy with the short example without checking the scripts, images, fonts, and connections required by the rest of the site.
Production checklist
Before linking to the form from your navigation, verify that:
- the contact and thank-you pages exist in the deployed output;
- the generated form contains the correct API key;
- the redirect uses an absolute HTTPS production URL;
- visible controls have labels, names, and clear focus styles;
- a normal submission leaves the honeypot empty;
- the CSP permits
https://api.staticforms.devinform-action; - production hostnames are present in domain restriction settings;
- a real submission appears in both the Static Forms inbox and the recipient inbox.
The result is still a static Eleventy site. Eleventy handles the templates and build, your host serves the generated HTML, and Static Forms handles the submission workflow without adding a backend to the project.
Related Articles
How to Add a Contact Form to Cloudflare Pages
Build and deploy a working Cloudflare Pages contact form with email delivery, spam protection, a thank-you page, and a practical test checklist.
How to Add a Contact Form to a Hugo Site (No Backend Required)
Add a working contact form to any Hugo site using a reusable partial and shortcode — no server, no plugins. Includes setup for popular themes like PaperMod and Ananke.
How to Add a Contact Form to a Jekyll Site on GitHub Pages
Add a working contact form to your Jekyll site hosted on GitHub Pages — no plugins, no backend, no server-side code. Complete step-by-step tutorial with a reusable include.




































