

How to Add a Contact Form to Cloudflare Pages
Cloudflare Pages can deploy an HTML site across Cloudflare's network, but static files cannot receive a form submission or send an email by themselves. You could add a Pages Function and an email provider. For a contact form, that is often more infrastructure than the job needs.
This tutorial uses a regular HTML form and Static Forms. The browser sends the submission to Static Forms, which validates it and delivers it to your inbox. Your Cloudflare Pages project stays static.
By the end, you will have:
- a contact form that works without client-side JavaScript;
- email delivery and a stored submission in the Static Forms inbox;
- a honeypot field for basic spam filtering;
- a custom thank-you page;
- a deployment and testing checklist for Cloudflare Pages.
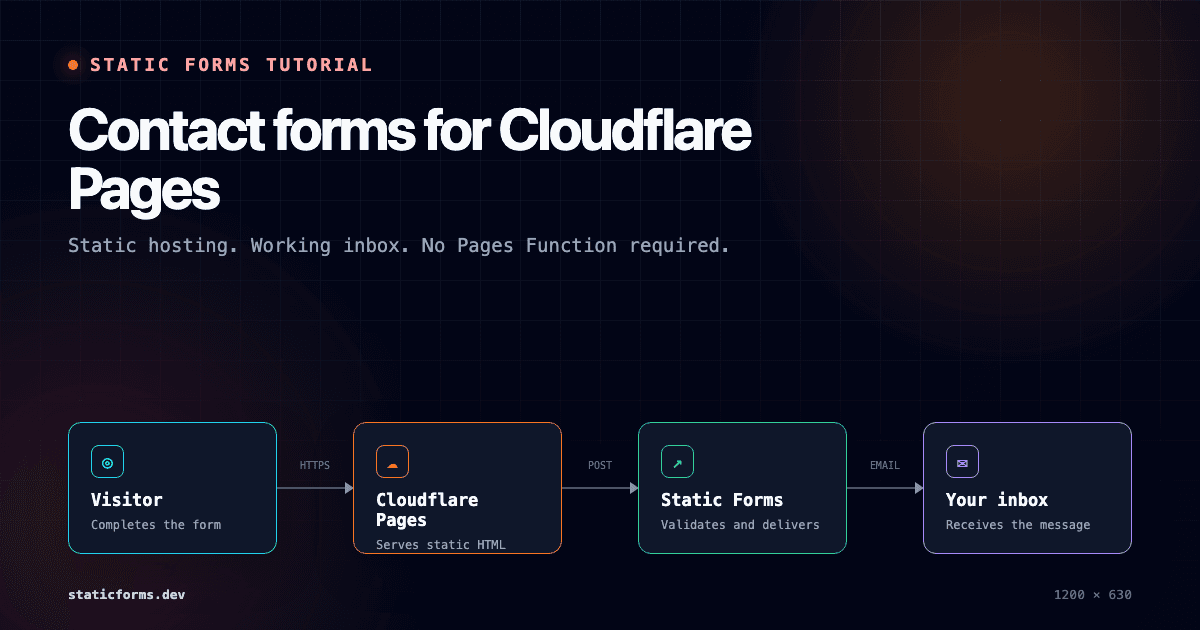
How the submission flows
The setup has three parts:
- Cloudflare Pages serves your contact page.
- The visitor's browser posts the form to
https://api.staticforms.dev/submit. - Static Forms processes the submission and sends the notification email.
Cloudflare Pages does not need to run a function in this flow. That also means there is no server code, email credential, or runtime secret to maintain in the Pages project.
Prerequisites
You need:
- a Cloudflare Pages project, or a static site ready to deploy;
- a free Static Forms account;
- an API key from your form in the Static Forms dashboard.
A Static Forms form API key is used in browser-facing HTML, so visitors can see it in the page source. It is an identifier, not a server password. If you want to stop another website from reusing it, enable domain restriction after your site is deployed.
Step 1: create the contact page
Create contact.html in the directory Cloudflare Pages publishes. Depending on your site, that might be the repository root, public, or a generated output directory such as dist.
Paste this complete example:
<!doctype html>
<html lang="en">
  <head>
    <meta charset="UTF-8" />
    <meta name="viewport" content="width=device-width, initial-scale=1" />
    <title>Contact us</title>
    <meta
      name="description"
      content="Send our team a message and we will reply by email."
    />
    <style>
      :root {
        color-scheme: light dark;
        font-family: system-ui, -apple-system, BlinkMacSystemFont, "Segoe UI", sans-serif;
      }

      body {
        margin: 0;
        background: #f7f7fb;
        color: #1f2937;
      }

      main {
        width: min(100% - 2rem, 42rem);
        margin: 4rem auto;
      }

      .contact-card {
        padding: clamp(1.5rem, 5vw, 3rem);
        background: #ffffff;
        border: 1px solid #e5e7eb;
        border-radius: 1rem;
        box-shadow: 0 1rem 3rem rgb(15 23 42 / 8%);
      }

      h1 {
        margin-top: 0;
      }

      .field {
        margin-top: 1.25rem;
      }

      label {
        display: block;
        margin-bottom: 0.4rem;
        font-weight: 650;
      }

      input,
      textarea,
      button {
        box-sizing: border-box;
        width: 100%;
        font: inherit;
      }

      input,
      textarea {
        padding: 0.8rem;
        color: #111827;
        background: #ffffff;
        border: 1px solid #9ca3af;
        border-radius: 0.5rem;
      }

      input:focus,
      textarea:focus {
        outline: 3px solid rgb(254 91 91 / 25%);
        border-color: #d93636;
      }

      textarea {
        min-height: 9rem;
        resize: vertical;
      }

      button {
        margin-top: 1.5rem;
        padding: 0.85rem 1rem;
        color: #ffffff;
        background: #d93636;
        border: 0;
        border-radius: 0.5rem;
        font-weight: 700;
        cursor: pointer;
      }

      button:hover {
        background: #b91c1c;
      }

      .honeypot {
        position: absolute;
        left: -10000px;
        width: 1px;
        height: 1px;
        overflow: hidden;
      }

      @media (prefers-color-scheme: dark) {
        body {
          background: #0f172a;
          color: #e5e7eb;
        }

        .contact-card {
          background: #111827;
          border-color: #374151;
        }
      }
    </style>
  </head>
  <body>
    <main>
      <section class="contact-card" aria-labelledby="contact-heading">
        <h1 id="contact-heading">Contact us</h1>
        <p>Send a message and we will reply by email.</p>

        <form action="https://api.staticforms.dev/submit" method="POST">
          <input type="hidden" name="apiKey" value="YOUR_API_KEY" />
          <input type="hidden" name="replyTo" value="@" />
          <input
            type="hidden"
            name="redirectTo"
            value="https://YOUR-PROJECT.pages.dev/thank-you.html"
          />

          <div class="honeypot" aria-hidden="true">
            <label for="website">Leave this field empty</label>
            <input
              id="website"
              type="text"
              name="honeypot"
              tabindex="-1"
              autocomplete="off"
            />
          </div>

          <div class="field">
            <label for="name">Name</label>
            <input id="name" name="name" type="text" autocomplete="name" required />
          </div>

          <div class="field">
            <label for="email">Email</label>
            <input id="email" name="email" type="email" autocomplete="email" required />
          </div>

          <div class="field">
            <label for="message">Message</label>
            <textarea id="message" name="message" required></textarea>
          </div>

          <button type="submit">Send message</button>
        </form>
      </section>
    </main>
  </body>
</html>
Replace two values before deploying:
YOUR_API_KEYwith the key shown for your form in Static Forms;YOUR-PROJECTwith your Cloudflare Pages project name.
If your site uses a custom domain, put that domain in redirectTo instead. The value must be an absolute URL, for example https://example.com/thank-you.html.
Why these hidden fields are present
apiKey tells Static Forms which form should receive the submission. replyTo set to @ uses the submitted email field as the Reply-To address. This lets you reply to the visitor from the notification email.
The honeypot input catches basic bots that fill every text field. Real visitors never interact with it. See the honeypot documentation for testing instructions and stronger protection options.
Step 2: add the thank-you page
Create thank-you.html beside contact.html:
<!doctype html>
<html lang="en">
  <head>
    <meta charset="UTF-8" />
    <meta name="viewport" content="width=device-width, initial-scale=1" />
    <title>Message received</title>
  </head>
  <body>
    <main>
      <h1>Thanks, your message was sent.</h1>
      <p>We will reply as soon as we can.</p>
      <p><a href="/">Return to the home page</a></p>
    </main>
  </body>
</html>
Keep the thank-you page out of your main navigation. A visit to this page can then serve as a clean form-completion event in your analytics tool.
Step 3: deploy to Cloudflare Pages
Cloudflare supports Git integration and direct uploads. Use the one that matches your project.
Git integration
Commit contact.html and thank-you.html to the connected repository. Cloudflare Pages builds the configured branch and publishes the output automatically.
Check your Pages build settings before pushing:
- The build command should match your static site generator. Plain HTML sites can leave it blank.
- The build output directory must contain both new files.
- Preview deployments use a different hostname from production, so test the production deployment before sharing the link.
Cloudflare's current Git integration guide explains the repository and build settings.
Direct upload
If your site is not connected to Git, build it locally and upload the output directory from the Cloudflare Pages dashboard. Do not upload the source directory if your framework generates a separate dist, build, or public folder.
See Cloudflare's Direct Upload guide for the current dashboard workflow.
After deployment, open:
https://YOUR-PROJECT.pages.dev/contact.htmlStep 4: test the deployed form
Do not stop after checking that the page renders. Run one real submission through the production URL.
- Open the contact page in a private browser window.
- Enter a name, an email address you can access, and a recognizable test message.
- Submit once and confirm that the browser reaches
thank-you.html. - Check the Static Forms inbox for the submission.
- Check the recipient inbox and spam folder for the notification email.
- Reply to the notification and confirm that the response is addressed to the email entered in the form.
- Repeat the test on a phone or narrow browser window.
Use a message such as Cloudflare Pages production test 2026-08-17 so it is easy to find and delete later.
Lock the form to your Cloudflare domain
Anyone can view a form API key in client-side HTML. That is expected. Domain restriction prevents another site from submitting with the same key.
In the form's Security settings, add the deployed hostname without https:// or a path:
YOUR-PROJECT.pages.devIf you use a custom domain, add that too:
example.comEnable localhost only while you need local testing. Domain restriction is available on eligible plans; the domain restriction guide covers subdomains and common configuration mistakes.
Fix a Content Security Policy error
A strict Content Security Policy can block the browser before the request reaches Static Forms. The console usually reports that the form action violates the page's form-action directive.
Cloudflare Pages reads response-header rules from a plain-text _headers file in the static asset directory. If you already send a CSP, add the Static Forms endpoint to form-action:
/*
  Content-Security-Policy: default-src 'self'; form-action 'self' https://api.staticforms.dev
Do not copy that whole policy into an existing site without reviewing it. Merge the form-action source into the policy you already use, otherwise you may accidentally block scripts, images, fonts, or API calls needed by the rest of the site.
Cloudflare documents the file syntax in Headers · Cloudflare Pages.
Common problems
| Symptom | Likely cause | What to check |
|---|---|---|
| The API reports an invalid key | The placeholder was not replaced, or the key belongs to another form | Copy the current key from the Static Forms dashboard |
| The form works locally but fails after domain restriction | The production hostname is missing from the allowed list | Add YOUR-PROJECT.pages.dev and any custom domain without a protocol |
| The submission succeeds but there is no email | The recipient is unverified, the message was filtered, or delivery is delayed | Check the Static Forms inbox first, then spam and recipient settings |
| The browser reports a CSP violation | form-action does not allow the Static Forms endpoint |
Update the Pages _headers file and redeploy |
| The thank-you page returns 404 | The file was outside the published output directory | Inspect the deployed artifact and verify the exact filename and URL |
| You receive bot submissions | A honeypot stops only basic automated traffic | Add Cloudflare Turnstile, reCAPTCHA, hCaptcha, or ALTCHA in the form's Security settings |
| A custom field is missing | The input has no name attribute |
Give every submitted input a unique name |
Optional: use Cloudflare Turnstile
Cloudflare Turnstile is a useful next step if the honeypot does not stop enough spam. Create a Turnstile widget for your production hostname, then configure its secret in Static Forms and add the widget to the page.
Follow the Static Forms Turnstile guide. Test both an accepted submission and a failed challenge before enabling domain restriction on every environment.
Production checklist
Before calling the form finished, verify that:
- the deployed form uses the correct API key;
- the recipient email is verified;
- the thank-you URL uses HTTPS and exists in production;
- every visible control has a label and a
name; - keyboard focus is visible;
- the honeypot remains empty during a normal submission;
- the Pages CSP permits
https://api.staticforms.devinform-action; - production and custom hostnames are in the domain allowlist;
- a real submission appears in both the Static Forms inbox and the recipient inbox.
The page remains a static Cloudflare Pages deployment throughout this setup. Static Forms handles form processing, email delivery, submission storage, and optional spam controls without adding a Pages Function to your project.
Related Articles
Add a Contact Form to Eleventy Without Writing a Backend
Build an Eleventy contact form that sends email without a server, with a copy-paste Nunjucks template, spam protection, deployment steps, and troubleshooting.
How to Add a Contact Form to a Hugo Site (No Backend Required)
Add a working contact form to any Hugo site using a reusable partial and shortcode — no server, no plugins. Includes setup for popular themes like PaperMod and Ananke.
How to Add a Contact Form to a Jekyll Site on GitHub Pages
Add a working contact form to your Jekyll site hosted on GitHub Pages — no plugins, no backend, no server-side code. Complete step-by-step tutorial with a reusable include.




































